Since I want to use this tool for our technician daily program, I need an alert if I place the same technician name (right now is a drop down field) in 2 row that has the same date, is this possible?
Well, I take this opportunity to ask another question: is it possible to show only the row that has a date equal or bigger than today?
Aaand, last but not least: is it possible to associate filters to users? So that a user can see all the row that has it’s name on a specified field.
Thanks!
Hi there!
You can do this using a lookupRecords function in Conditional formatting for rows. In the screenshot below, you’ll see that if a record with the same name and date appears more than once, it will appear red.
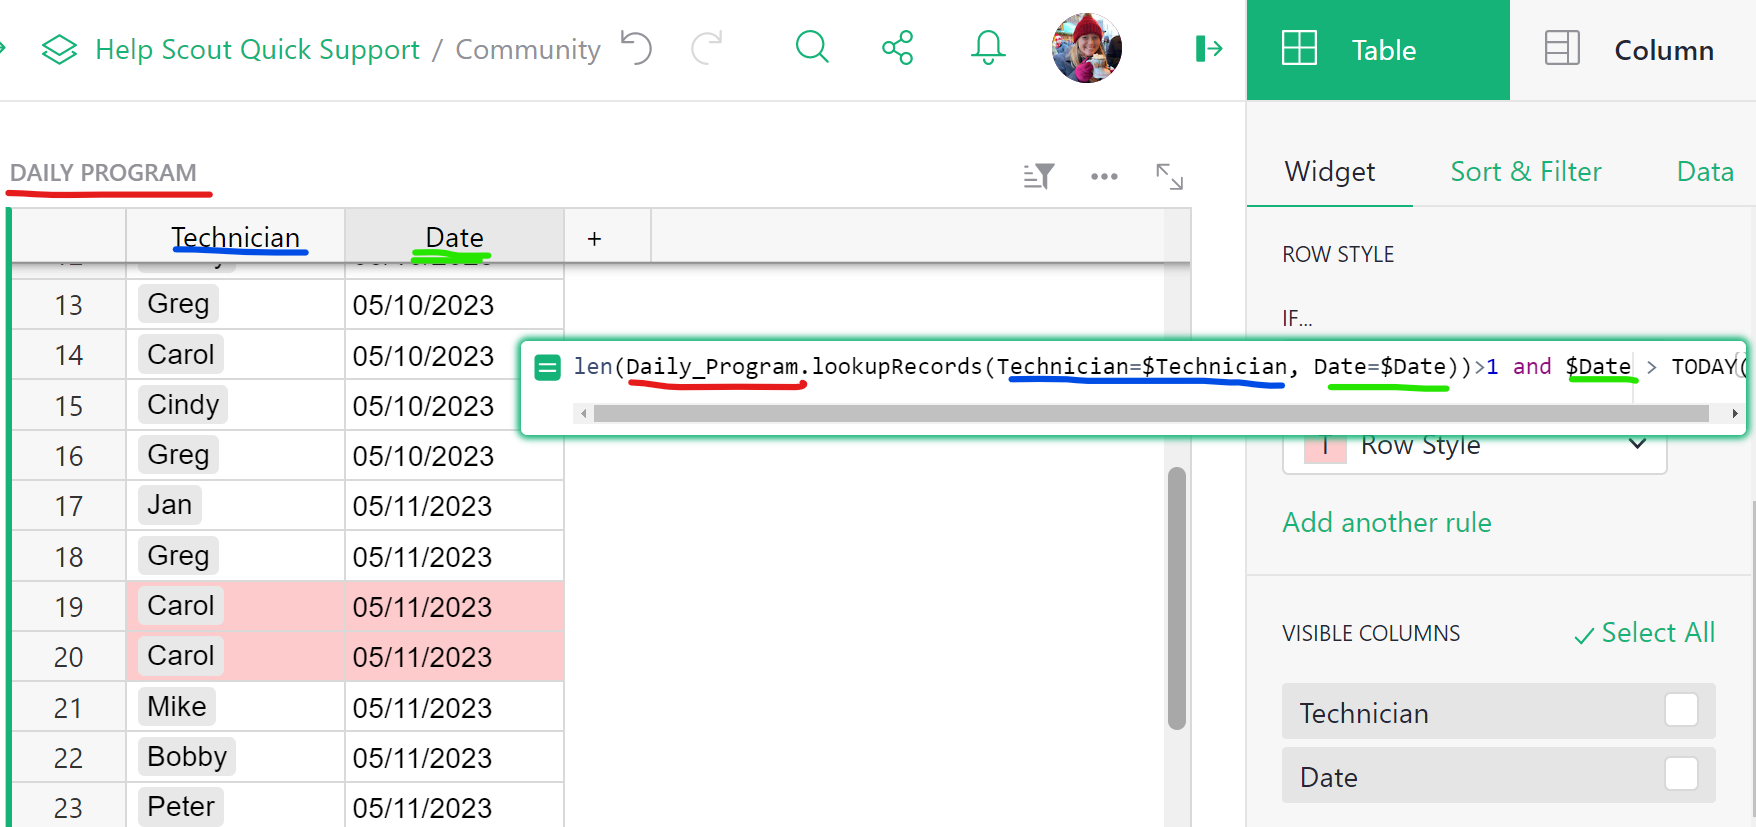
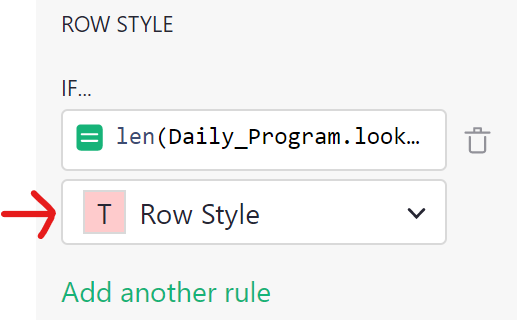
To add a row style, open the creator panel by clicking the green vertical bar with arrow at the upper right of the screen.
Under the Table tab and Widget subtab, you’ll find the ‘Row Style’ menu.

Click the green ‘Add conditional style’ text then enter the following formula;
len(Daily_Program.lookupRecords(Technician=$Technician, Date=$Date))>1 and $Date >= TODAY()
Be sure to change the style for this particular condition so these rows stand out. I selected a red fill for this example.
Let’s break down the formula.
First, we have our lookupRecords function; Daily_Program.lookupRecords(Technician=$Technician, Date=$Date)
This function looks up all records in the Daily Program table where the value in the Technician column matches and the value in the Date column matches and returns a list of records that match those parameters.
Then we have this contained within the parenthesis of len()>1. len() counts the number of records found in the lookupRecords function. If there are more than 1 records in that list, this portion of the formula is True.
The last piece of the conditional formula is $Date >= TODAY(). If the value in the Date column is greater than or equal to Today’s date, this portion of the formula is True.
We have and separating these two pieces. So, if part A is True AND part B is True, then the formula is True and the row color will change.
Absolutely! If you want a quick, temporary filter, you could add a filter button. Then, the user could click the button and filter to their own name. You could also set up a special view that uses Access Rules to filter. This second method is a bit more difficult to set up but steps are provided for both options below.
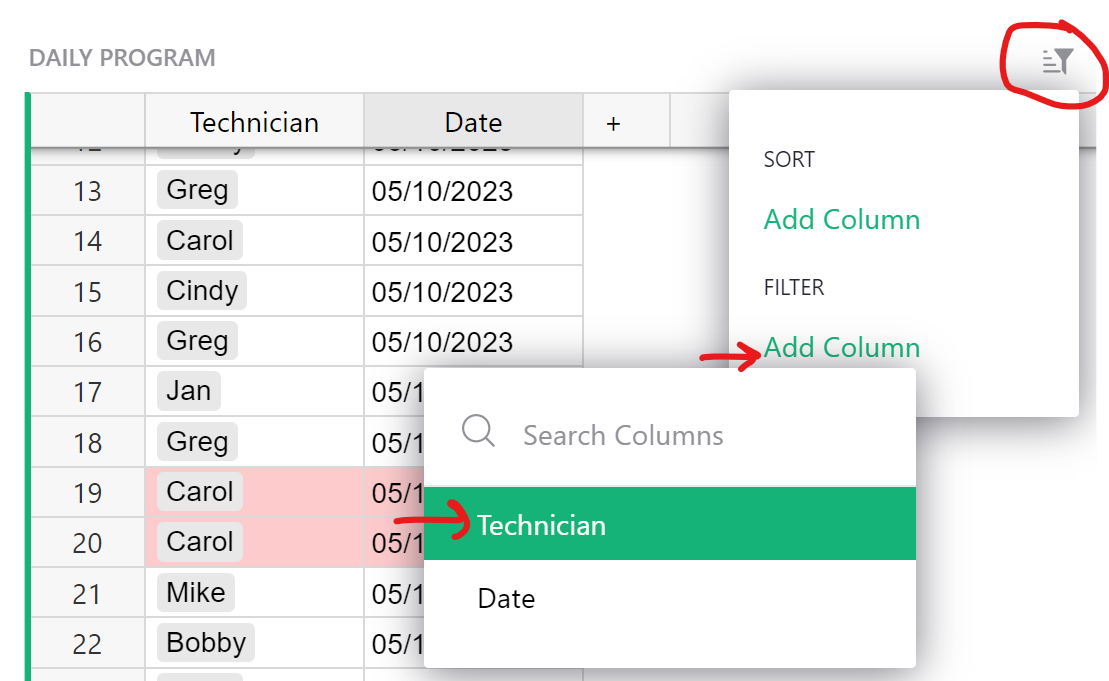
Filter Button
To add a filter button to the top of the table, click the filter icon then ‘Add Column’ under the Filter menu. Select the column you wish to add a button for - in this case, Technician.
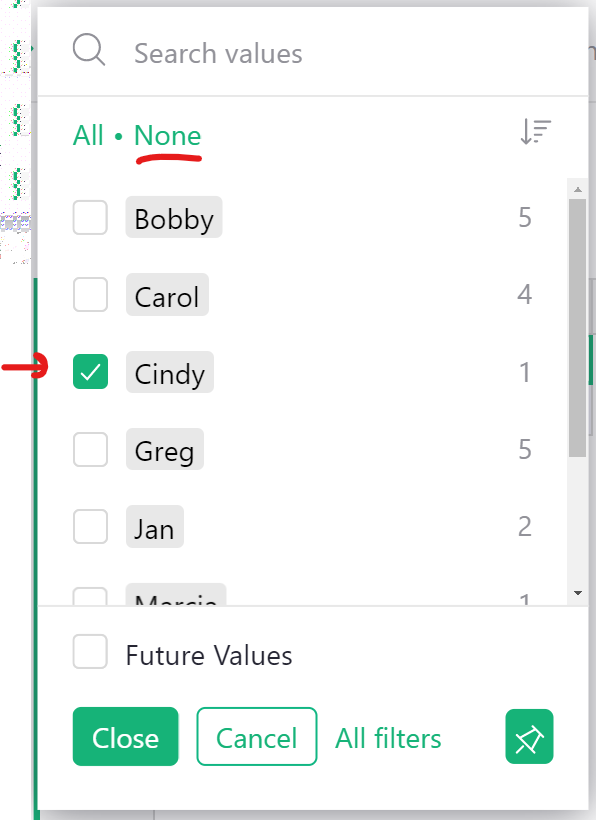
All of the column values will appear. Click close as we want to leave all values visible. Then, click ‘Save’.

Now you will have a handy button at the top of the table. Users could come in and filter out all values then just check their own name to view all records where they are listed as the technician.
Using Access Rules
You can create a view where it only shows records where the logged in user’s name is listed using Access Rules.
Because user’s can change the name associated with their Grist account, it is better to use their email. We can create a separate table that links each email to a Technician’s name. You may already have a table like this set up.

Now, we need to make sure the Technician column in the Daily Program table is a reference column that pulls data from the Technicians table.
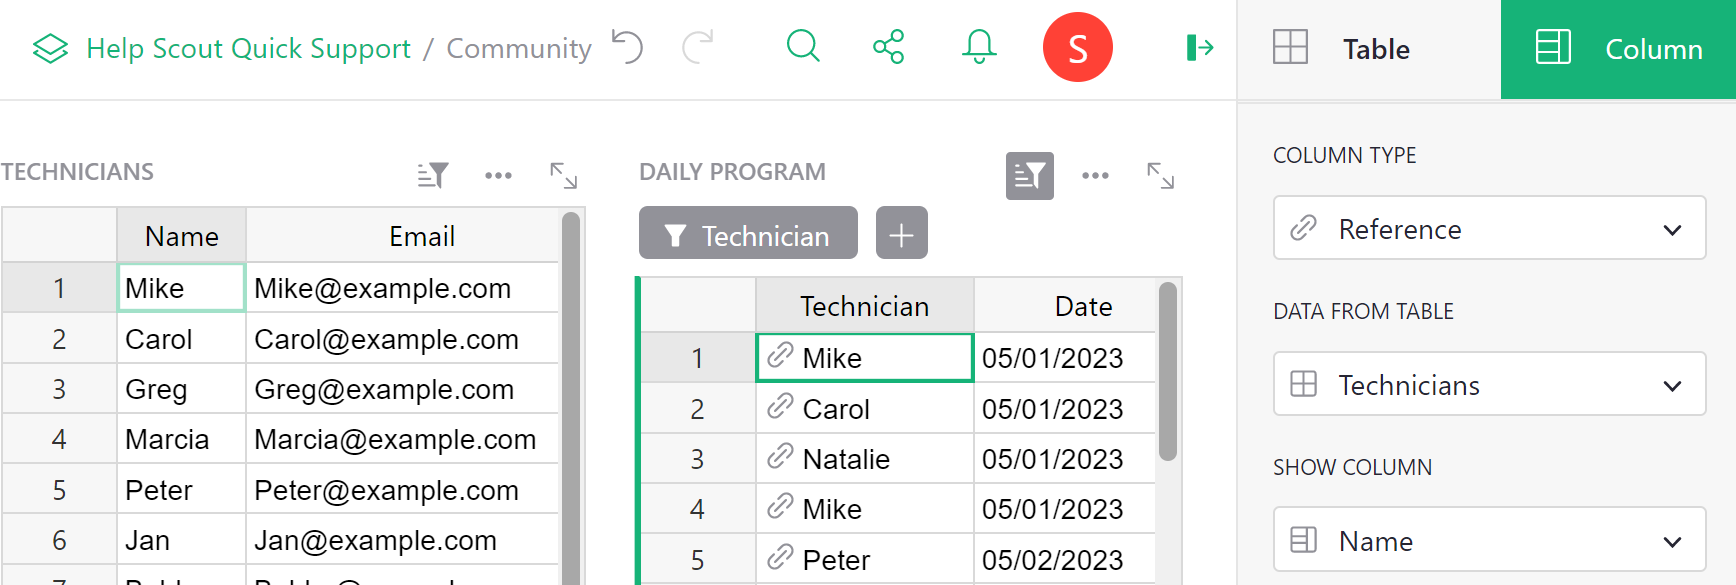
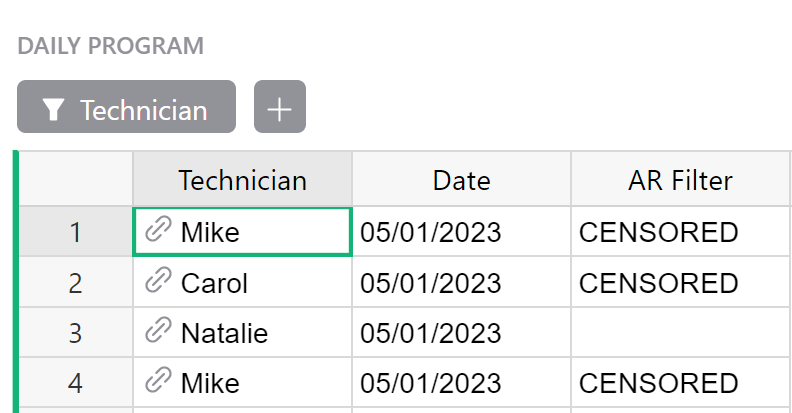
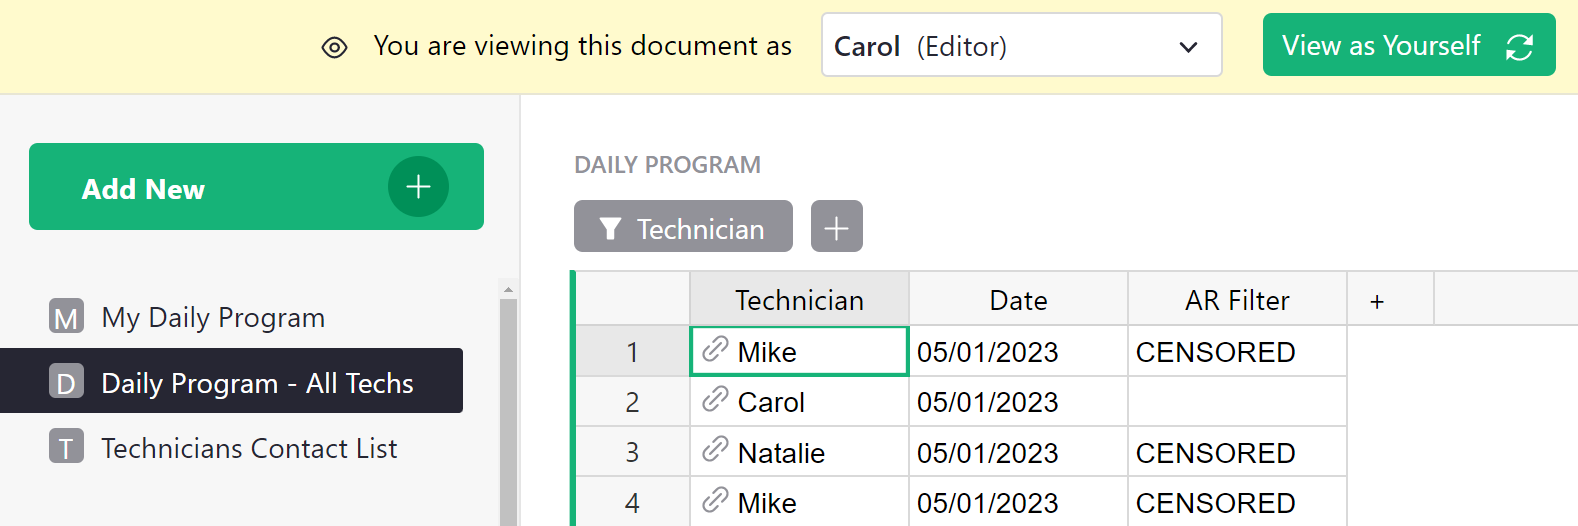
Next, add a new column to the Daily Program table and give it a name. I’ve named it “AR Filter” for the example. That’s all we need to do - add the column and title it. It’s only purpose is to be used for filtering in a later step (then, we can hide it).
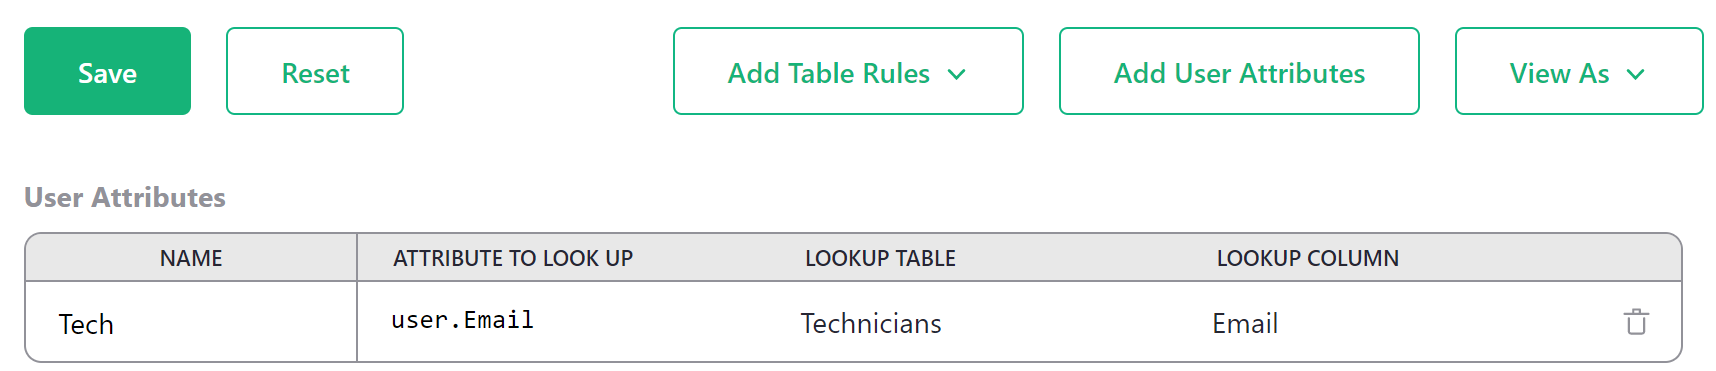
This leads us into setting up our Access Rules! Under the Tools menu in the left-hand column, select Access Rules. At the top of the page, select ‘Add User Attributes’. Here, we are matching the logged in user with the matching email under the Technicians table. Give the User Attribute a name. I named it Tech. Please note that if you name it differently, your conditions will be slightly different below (where you see Tech, replace with the name you chose). Attribute to lookup is user.Email > lookup table is wherever our list of names and email is (in this example, Technicians table) > lookup column is Email.
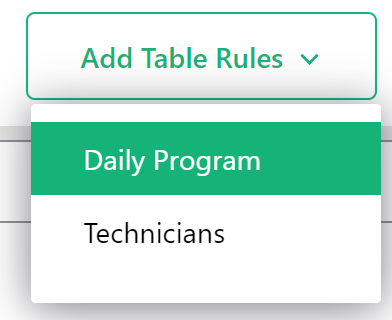
Next, we need to add a rule for our AR Filter column in the Daily Program table. Click the ‘Add Table Rules’ button and select ‘Daily Program’.
Click the three-dot icon at the upper-right of the table then ‘Add Column Rule’.
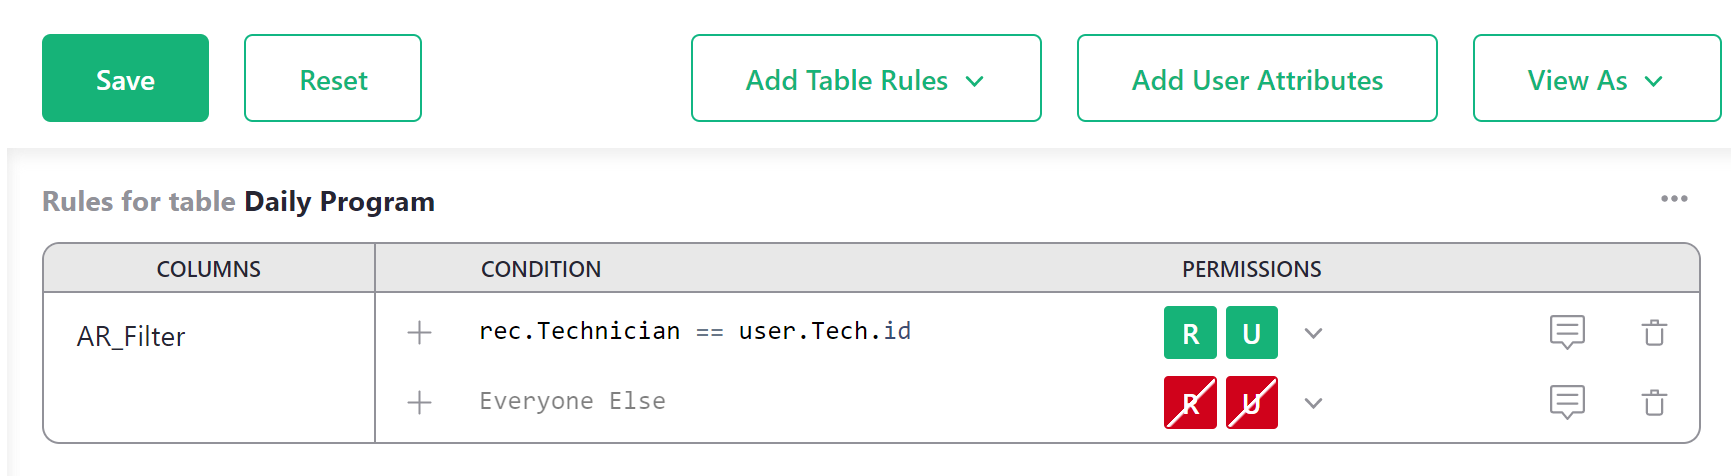
Select ‘AR_Filter’ (or whatever your column for filtering was named) then enter the following condition;
rec.Technician == user.Tech.id
Allow all permissions. Add another condition by clicking the + which will default to ‘Everyone Else’. Restrict all permissions. Be sure to save your changes by clicking the green icon at the top of the page.
Now, the AR Filter column will show as ‘CENSORED’ for all records where the logged in user’s name does not appear.
Create a new page with the Daily Program table by clicking the green ‘Add New’ button then ‘Add Page’. Add the Daily Program table.
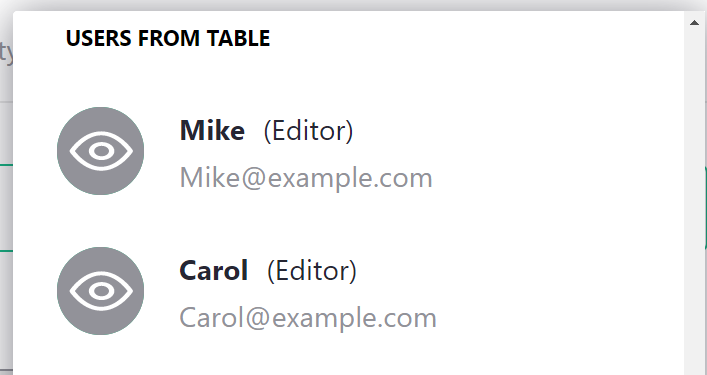
Now navigate back to Access Rules and log in as a user by clicking the ‘View As’ button and selecting a user who appears in the Daily Program table.
In the new view of the Daily Program table, filter the new AR Filter column and hide ‘CENSORED’ values.
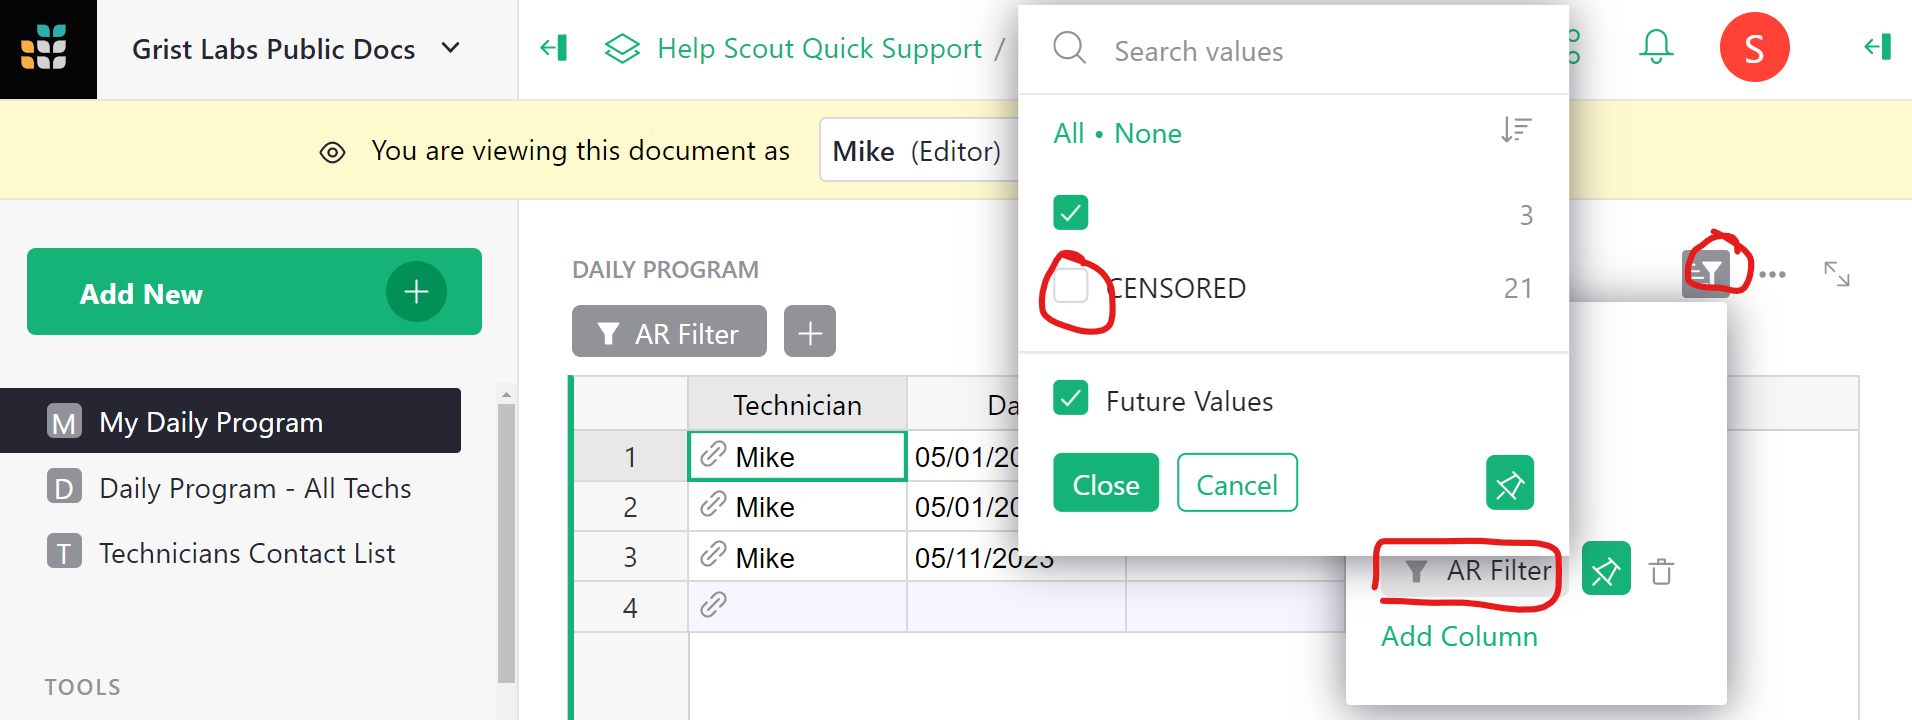
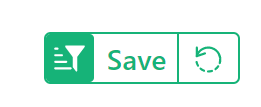
Be sure to click ‘Save’ after applying your filters.
Now, this page will show records only for the logged in user. If Carol logs in, she will only see her records on this particular view.

She can still see the full Daily Program on the other page.
Now that we have our filter set up, we can hide the AR Filter column from all views. In each view, right click AR Filter header then ‘Hide Column’.
You can see my example document with Access Rules here: Community #2550 - Grist
if you have any follow up questions, please let me know!
Thanks,
Natalie
1 Like
Hi Natalie!
Thanks for your reply, your explanations and examples have really been helpful!
This formula works only if the cells are exactly the same. In my case the column Technician can have multiple people selected and if in one row I select Technicnan1 and Technicnan2 and in the next row I select Technician1, it doesn’t work. ![]()
Is it possible to have multiple selection with references?
Is there a way to block the user to disable that filter? And maybe let them be able to apply other filter (bonus request!).
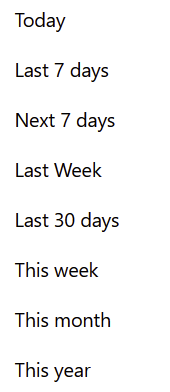
One last thing: is it possible to show only the row that has a date equal or bigger than today? In the filters I see only these:
Thanks again!
Ok, I got this one, I totally missed the “Reference List” column type!
@natalie-grist for the other 2 things? (The formula with “contains” function instead of “=” and block certain filters for users)
Thanks!
Reference Lists make it a bit more complicated but still possible ![]() The formula would be:
The formula would be:
# get all the records with the same date
by_date = Daily_Program.lookupRecords(Date=$Date)
# flatten the list
all = [p for group in by_date.Technician for p in group]
# get duplicates
dups = [p for p in all if all.count(p) > 1]
# test if current row is in the dups list
common = set($Technician).intersection(dups)
len(common) > 0
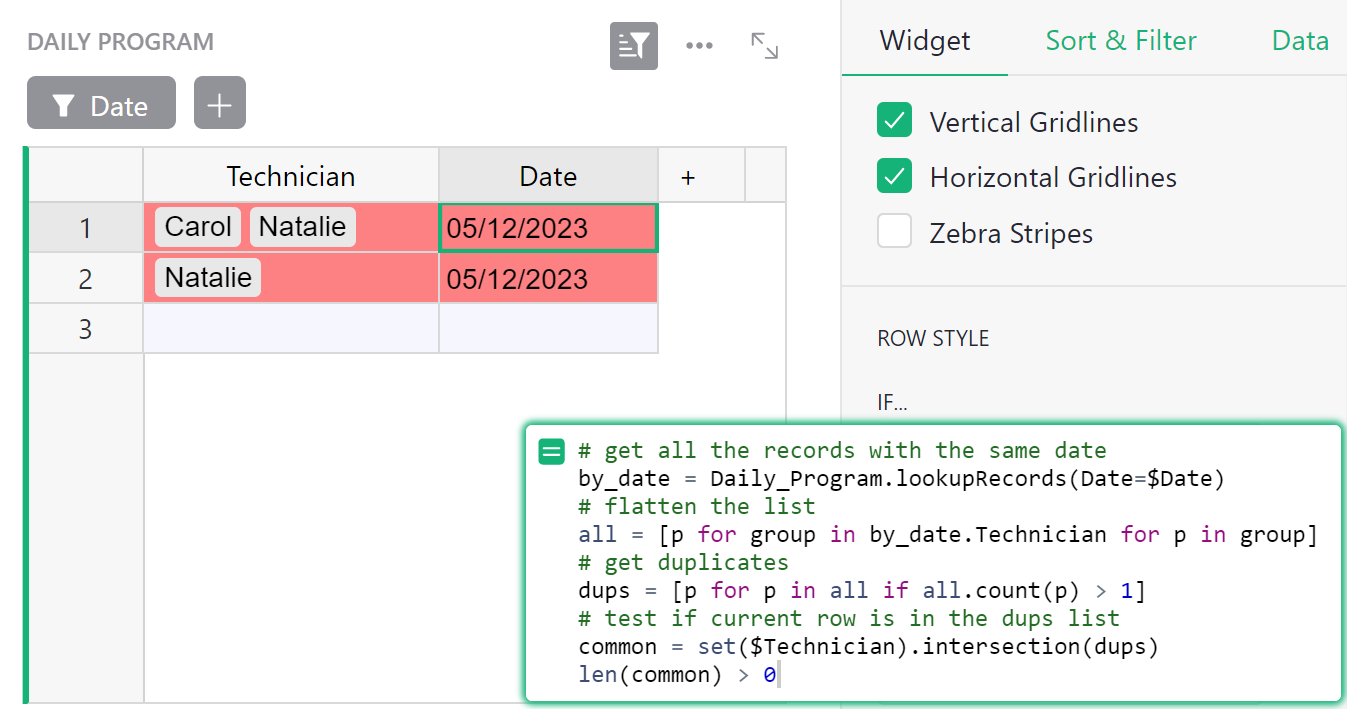
This will change all dupes to the conditional formatting applied. We can add a second conditional statement so that dates prior to today’s date are changed to a different formatting using the formula:
$Date < TODAY()
Then set the formatting for this one to something different. If you still want it to stand out, perhaps change it to a yellow fill. If you want it to be the same as the default, you can change it to have a white fill.

Because Technician is now a reference list, we will also need to update the Access Rule that we had set up for our AR Filter on the ‘My Daily Program’ page. Change the Access Rule from rec.Technician == user.Tech.id to user.Tech.id in rec.Technician

You can block users with EDITOR access from deleting any saved filters. This is controlled by a special rule. Note that this same rule also restricts their ability to add/delete/rearrange columns and make any other structural changes.
Navigate to Access Rules then at the bottom of the page, uncheck the box that ‘Allow editors to edit structure’.

This would prevent them from being able to save new filters as well. They would still be able to apply/delete filters in their current session but these changes would not be saved to the working document and the document would revert to the saved settings when refreshed.
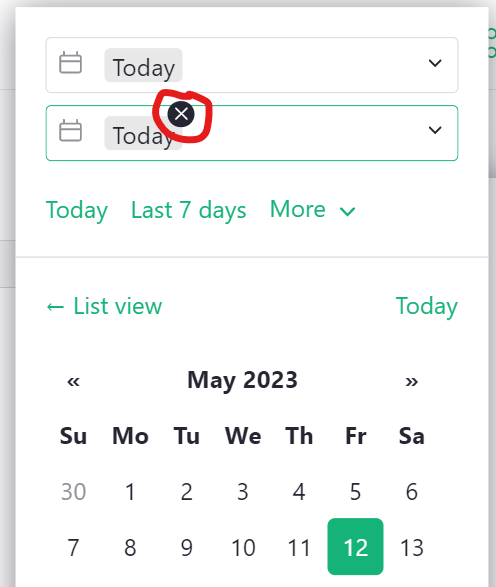
Absolutely! Set start date to Today then don’t set an end date. When you first select Today as a start date, Grist auto-populates end date to Today as well but when you hover over the text, an x appears and you can delete it.
All these changes are visible in Community #2550 - Grist
Hi @natalie-grist , thanks a lot for your reply! It really helped me!
I see, but I need the technicians to view only the row assigned to them, they must not delete filters, even if this is not permanent. Is this possible?