Hi there,
You can use UUID() to assign a unique ID for each customer then create a LinkKey to create unique URL’s for each customer to use to access the document. You can use these unique IDs to restrict access to data.
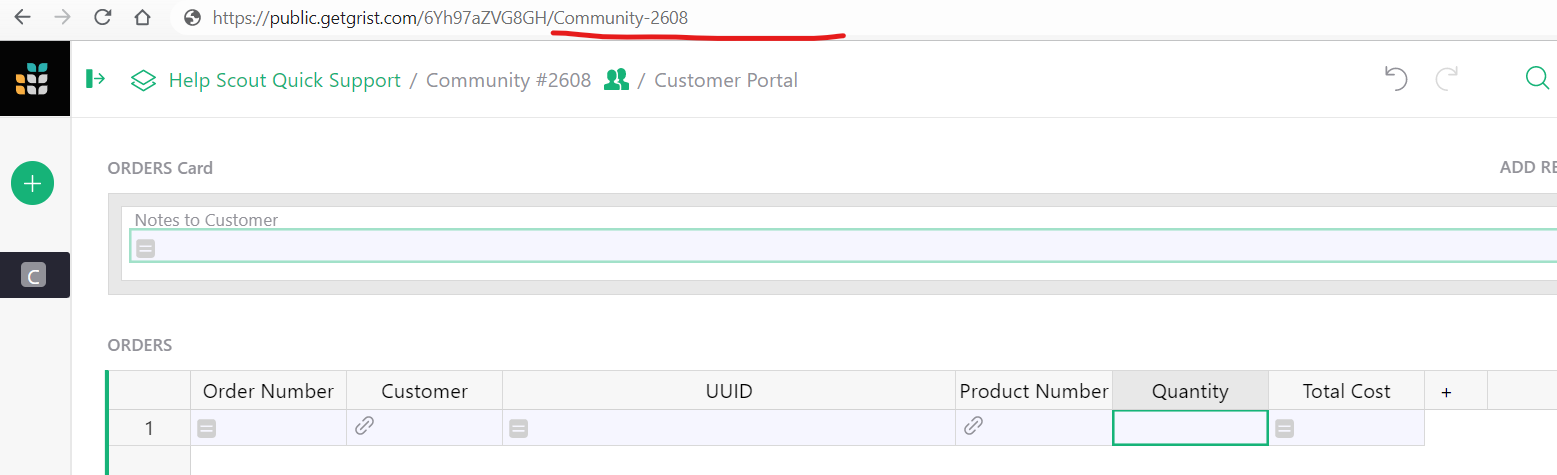
I created an example for you here: Community #2608 - Grist
First, create a UUID() for each customer by creating a formula column with the formula UUID(). Be sure to make this a Trigger Formula that applies to NEW records. This way, the UUID() is generated when a customer is created but does not regenerate again after that.
Next, you’ll want to create your unique URL for each customer using SELF_HYPERLINK() along with UUID(). Add another formula column using the formula SELF_HYPERLINK(LinkKey_UUID=$UUID).
This creates a unique URL that incorporates the UUID we just generated.
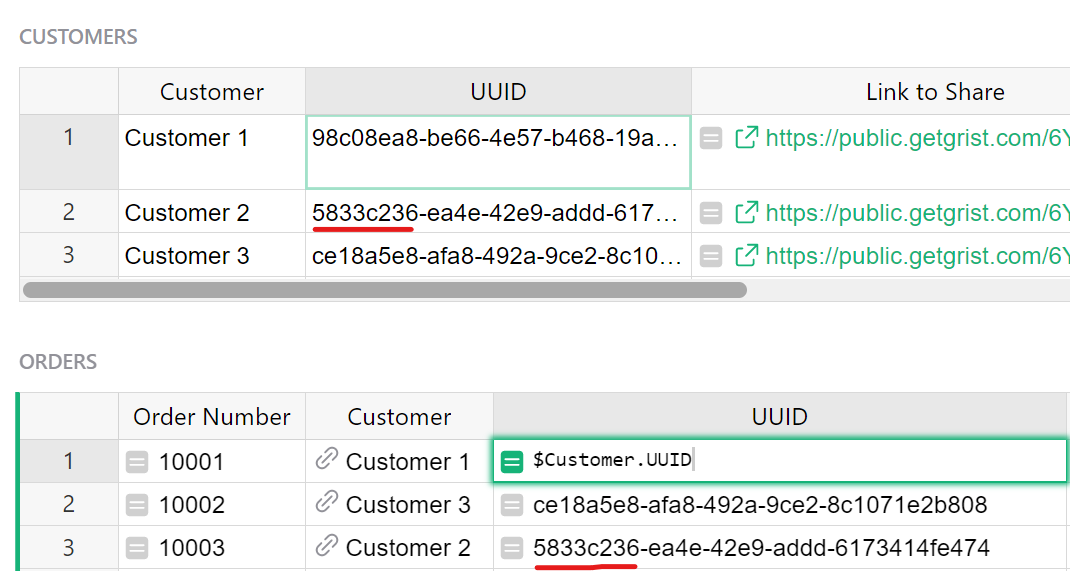
Now, we need this unique ID tied to whatever data we want to grant access to. In this example, a customer should have access to an order they are listed on. So, in the Orders table, we have a column labeled ‘Customer’ that is a reference column pointing to the Customers table. This allows us to link an existing customer to each order. We also have a UUID column in the Orders table that pulls the UUID value in from the Customers table using the reference column, Customer.
GRANTING ACCESS
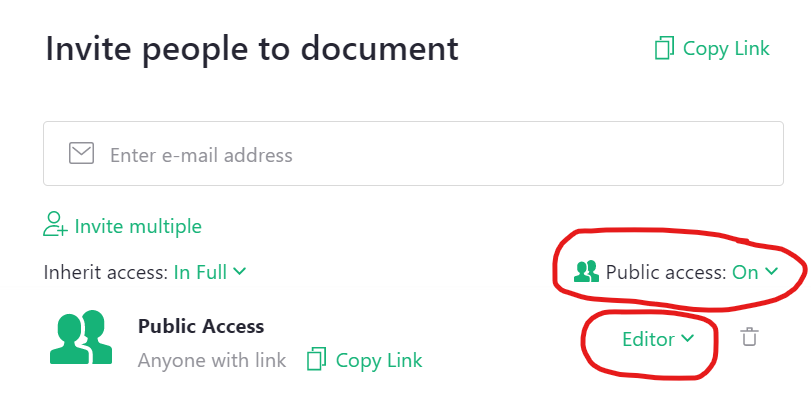
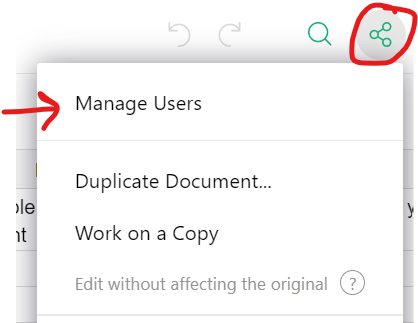
In order for our customers to have access to this document without logging in, we’ll need to grant public access to the document. Click the ‘Share’ icon then ‘Manage Users’
Change ‘Public Access’ to On then change access level to Editor. Be sure to click the green confirm button to save the changes.
Now that people can publicly access and edit our document, we need to set up Access Rules to restrict what public users can see and edit when they access the document. We can use the unique URL we created to grant special permissions to those users based on the UUID.
First, we want to restrict what Editors can do within the document. By default, they have the same access as Owners.
- Uncheck the first box under ‘Special Rules’. This will remove the ability for Editors to edit structure. This means that editors will no longer be able to edit formulas or add/remove columns, etc.
- Check the box directly under ‘Default Rules’ - this will automatically add a permission to table rules that will grant OWNER full access. This just saves us a step of having to add it ourselves.
- Add a new condition by clicking the
+ icon then enter the condition user.Access == EDITOR and deny all permissions. With this new rule, by default, Editors will not have access to anything in the document. This helps protect your data as we can add back access to specific tables, columns, etc as needed.
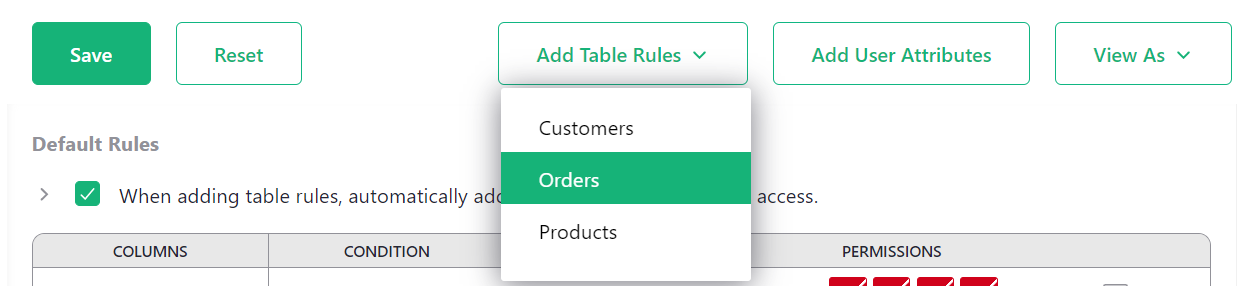
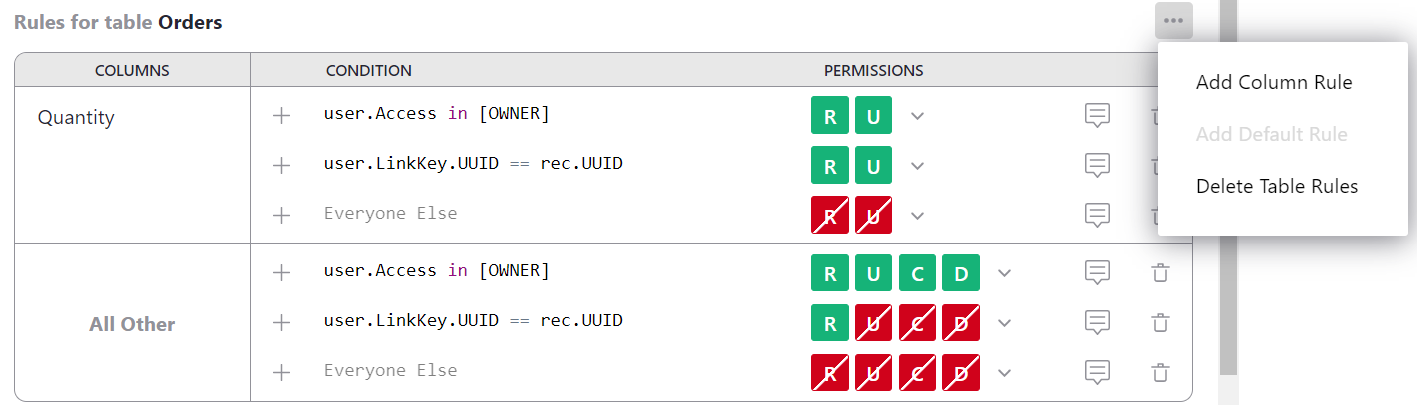
Next, we need to grant customers access to our Orders table so they’ll be able to see information as well as enter missing information. To add table rules, click the ‘Add Table Rules’ button then select the table you wish to add rules for - in this example, we are adding rules to the Orders table.
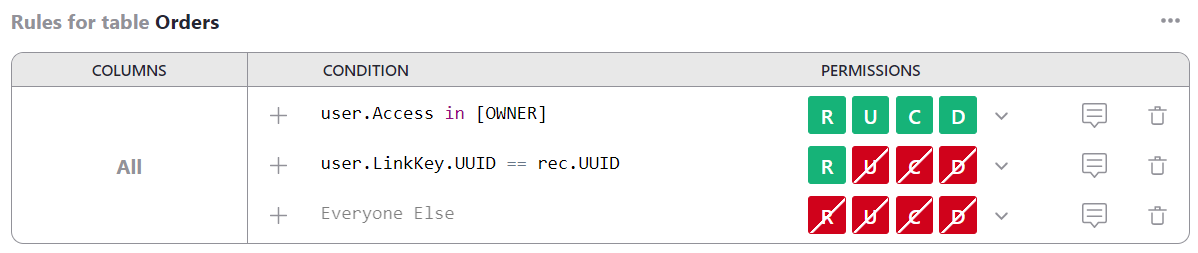
The first rule user.Access in [OWNER] will be added automatically since we checked that box under Default Rules in an earlier step.
Add another rule by clicking the + icon then enter the condition user.LinkKey.UUID == rec.UUID and apply read-only access.
Add one last condition for Everyone Else and deny all permissions.
Now, when a customer accesses the document using their unique link, the UUID in that link will determine which records they should have access to. If it matches the UUID for a record in the Orders table, the customer will be able to view that data. If the UUID does not match, the data will not be viewable.
Next, we want customers to be have the ability to edit the Quantity column. Click the three-dot icon at the upper right of the table rules and then select ‘Add column rule’.
In the left hand dropdown, select the column ‘Quantity’. Add the condition user.LinkKey.UUID == rec.UUID and allow all permissions.
Add one more condition for Everyone Else and deny all permissions.
Now, when a customer uses their link to view the document, they’ll only see data pertaining to them. The screenshot below is taken from Customer 1’s view.
Note that when viewing with the customer-specific URL, you must be logged out of Grist. It helps to open the link in a different browser so you can be logged in on one view but logged out and viewing the customer’s view elsewhere.
When testing your access rules, always delete the UUID from the URL to confirm that someone accessing your document without a unique ID would still be restricted from seeing data.
If I delete the UUID portion of the URL, I am unable to see any data in the document.
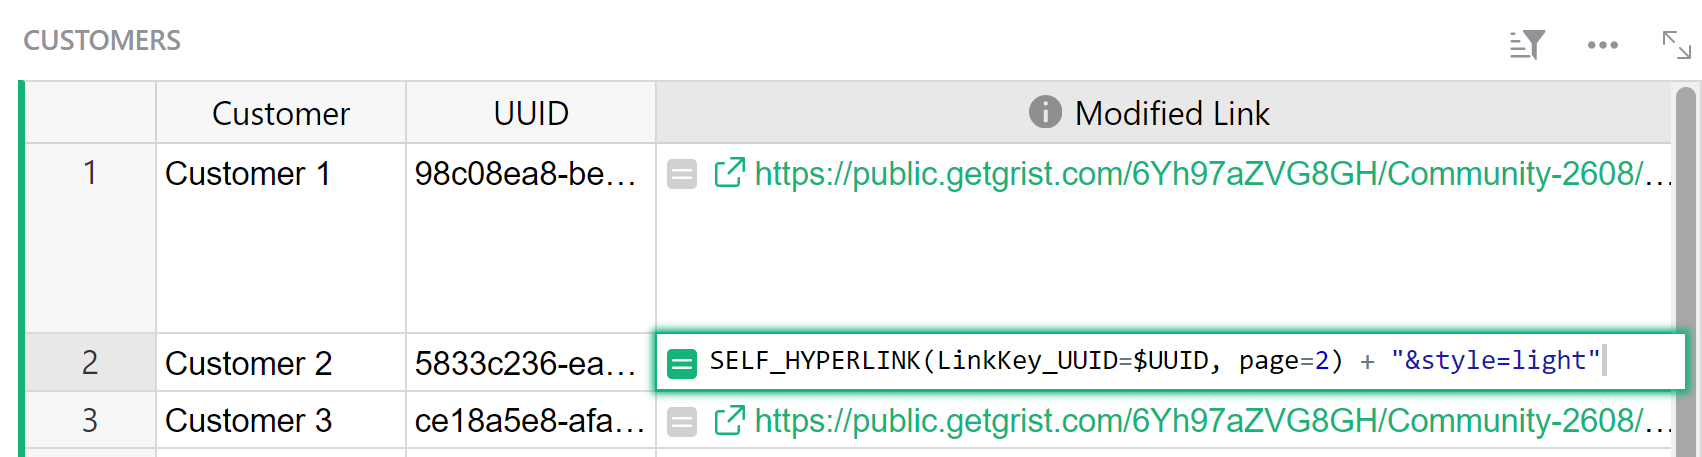
You can modify the unique URL if you only want to show a specific page and without any of the Grist panels. In the Customers table, I have another column ‘Modified Link’ that directs the URL specifically to page 2 of the document (page titled Customer Portal) and displays the page in an ‘embedded’ format, removing the left and right hand panels as well as the upper navigation bar.
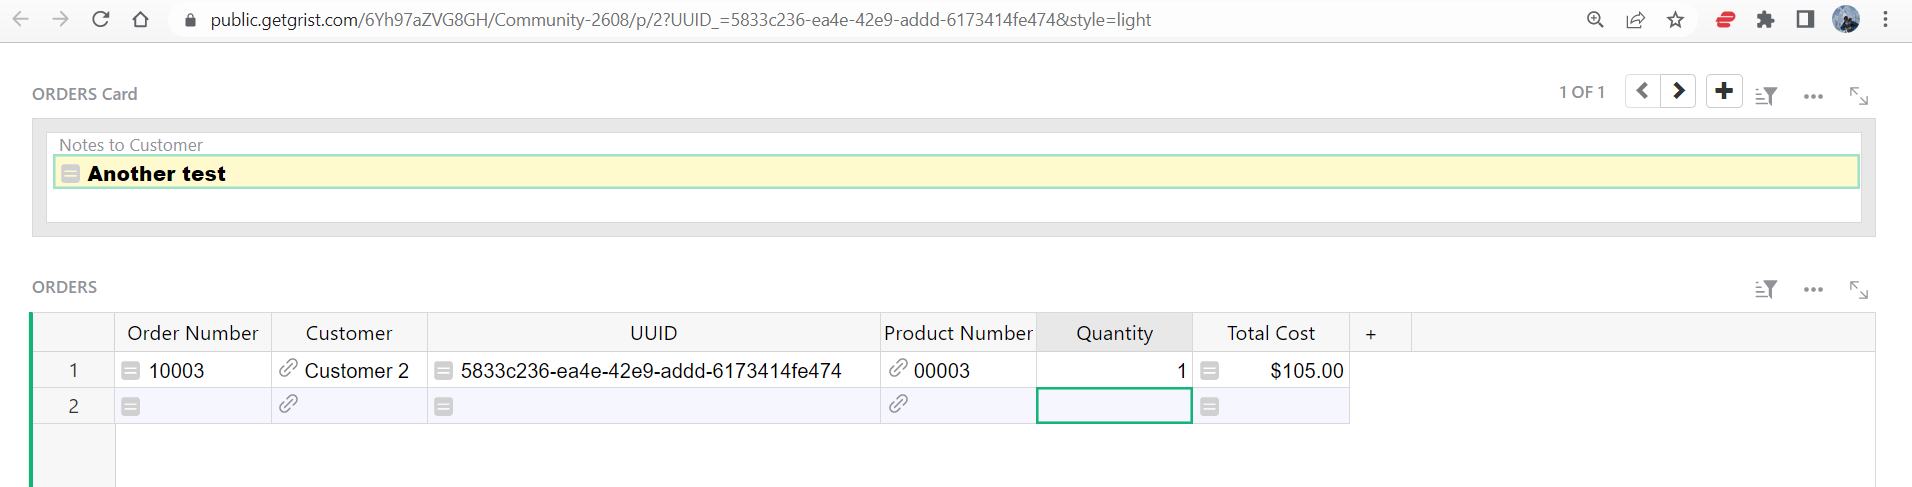
When I follow this URL for Customer 2, you’ll see the customer only sees their own data but now, they don’t see all of the Grist-specific panels.
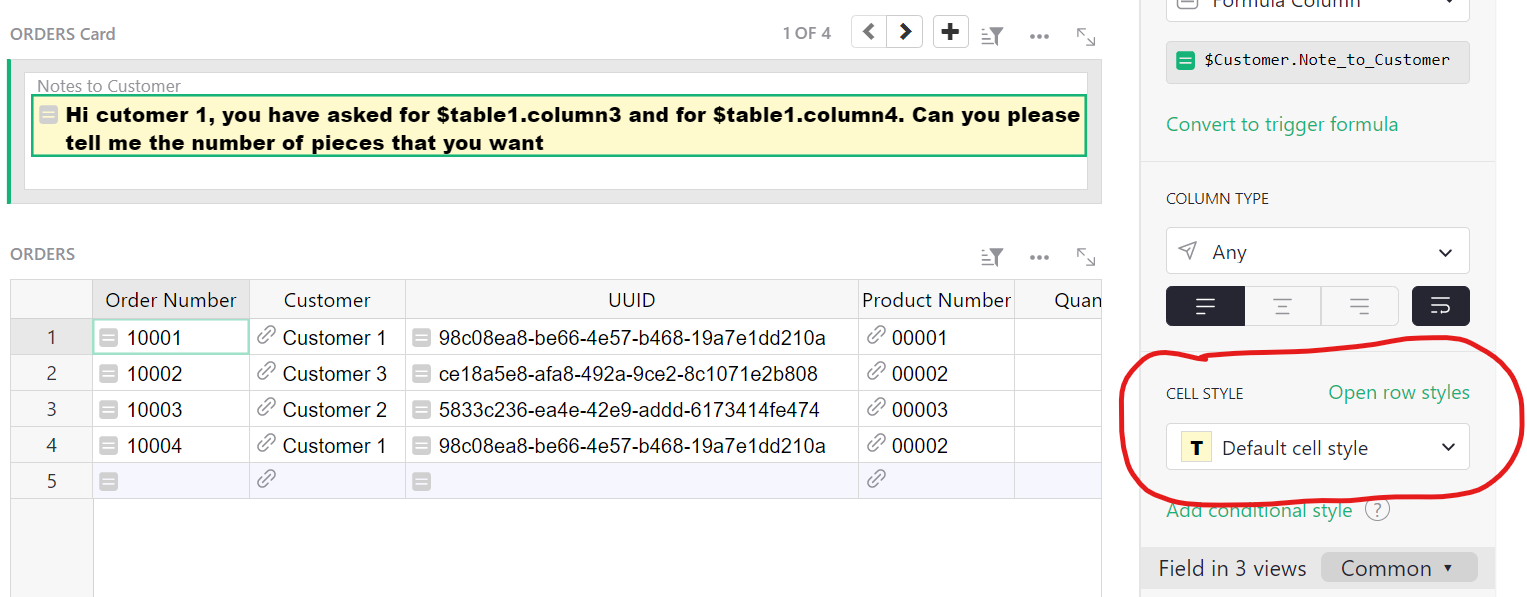
Last - I have a ‘Note to Customer’ field on the Customers table where you can enter a note to the customer. In the Orders table, this value is pulled in using the reference column like we did with UUID.
On the Customer Portal page, I added a Card Widget with only the ‘Notes to Customer’ field showing. Then changed the cell styling so it looks more ‘informative’.
The way I have it set up in the example, there is one single note per customer but you could set this up so each order has a unique note.
I hope this information helps - please let me know if you have any follow up questions.
Thanks,
Natalie