Need to collect some information from a lot of people and store that information in Grist? Then this example is for you!
Check out our example document here: Form Example - Grist
Let’s say you are running an event and want to collect contact information for attendees using Grist. Attendees could follow a provided link and fill out a card widget with their contact information.
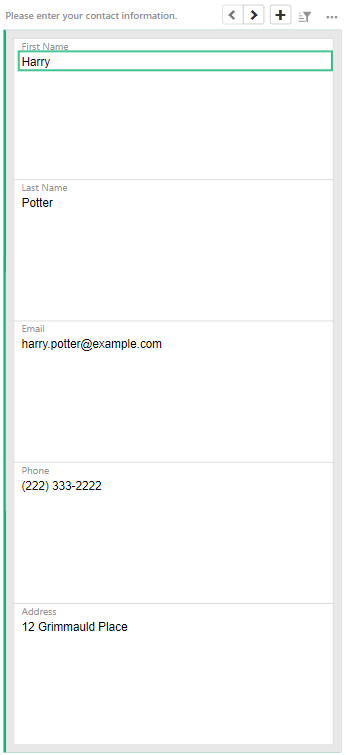
You, as document OWNER, would have access to all submitted entries.

We’ll use Public Link Sharing, SessionID and Access Rules to make this work like magic! ![]()
Since the attendees accessing the document would not be logged in, we need a way to capture their unique session ID. We have a great webinar walkthrough of using user.SessionID to record a session ID for a user who isn’t logged into Grist. Check it out here: Access Rules Webinar - SessionID
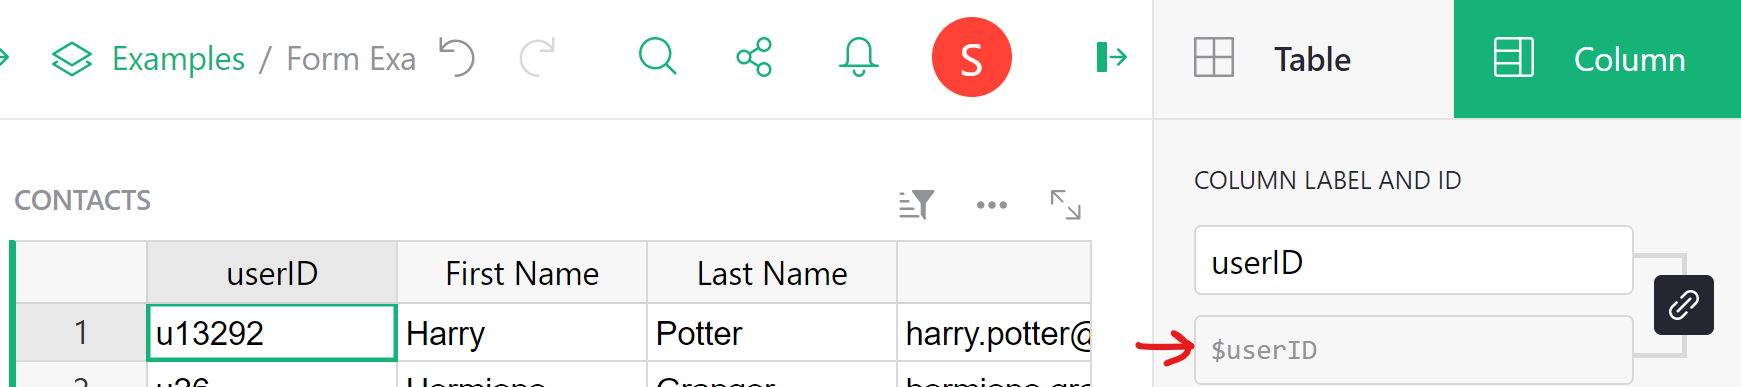
You will need to have a column with the trigger formula user.SessionID that applies to new records.
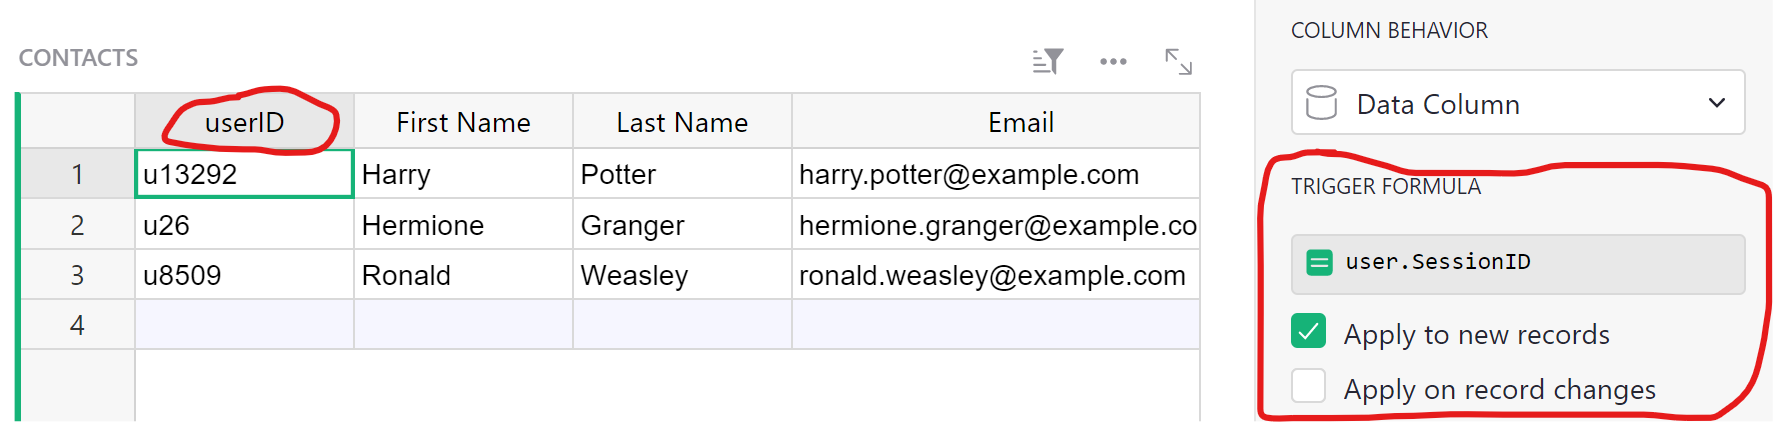
This will log a unique session ID for each person who accesses the document and enters contact information. We’ll use this with Access Rules to restrict access to other data in your document.
Navigate to Access Rules, available in the Tools menu in the left-hand navigation panel.
Because the public will require EDITOR access, we need to lock down the document structure. Uncheck the box at the bottom below ‘Special Rules’ (highlighted). This will remove access for Editors to change any structure. Meaning, they can’t add/remove columns, update formulas, etc.
We also want to restrict those with EDITOR access from accessing any of our data. By default, they get the same permissions as OWNER. Click the + icon to add a new condition to the Default Rules table. Enter the following: user.Access == EDITOR and deny all permissions. This changes their default access to no access. We’ll add permissions back on a table-by-table basis.
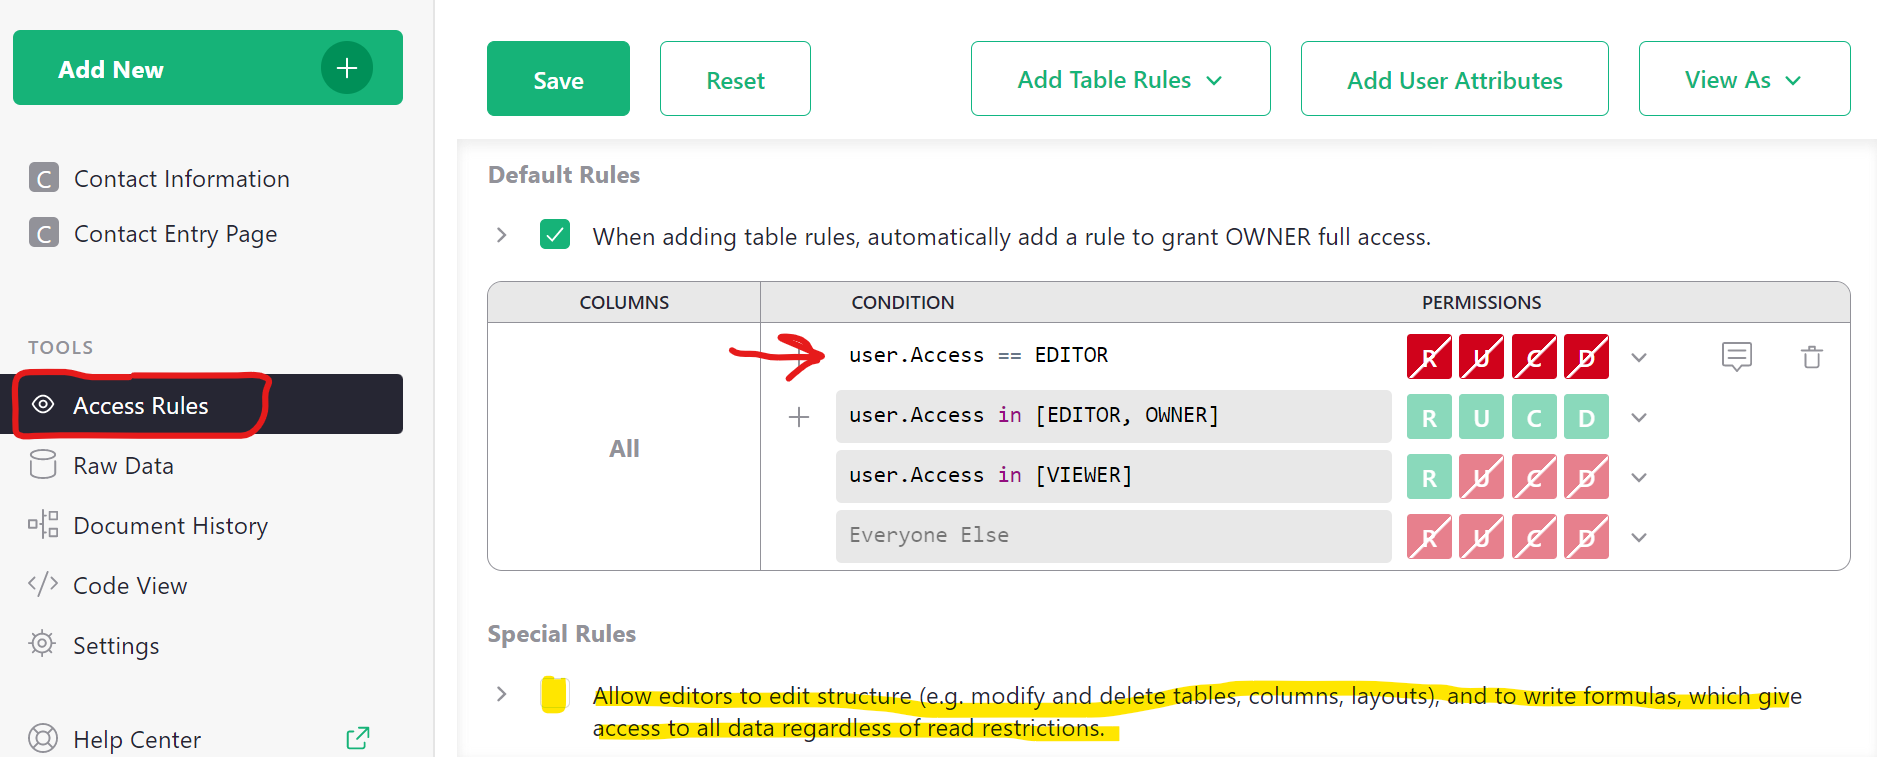
Check the box under ‘Default Rules’ that will add a rule to grant OWNER full access. Then, when we add table and column rules, the condition user.Access in [OWNER] is automatically added, saving us a bit of typing. ![]()

To add Table Rules, click the ‘Add Table Rules’ button at the top of the Access Rules page then select the table you wish to add specific rules for. In this example, we want to add Access Rules for the table where contact information will be stored, the Contacts table.

The condition granting OWNER access will automatically be added.
Add another rule with the condition user.SessionID == rec.userID and allow R (read), U (update) and C (create) but deny D (delete) permissions. Click the + icon again to add a final rule for Everyone Else and deny all permissions.
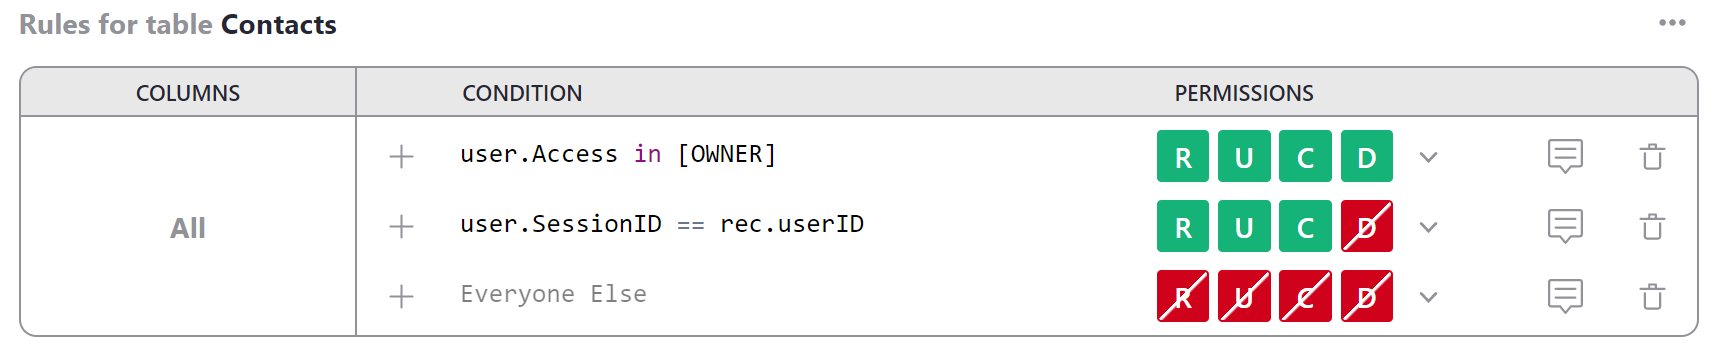
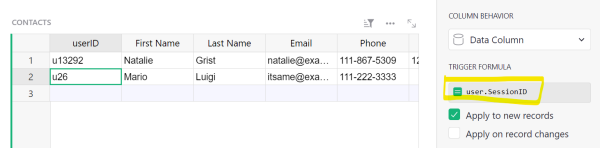
user.SessionID == rec.userID will grant users the ability to add records and update those records they have added. They will not be able to delete any records. Note that userID in this condition is the Column ID where our trigger formula user.SessionID exists. if you name the column containing the SessionID trigger formula anything different than this example, replace userID with whatever that column’s ID is.
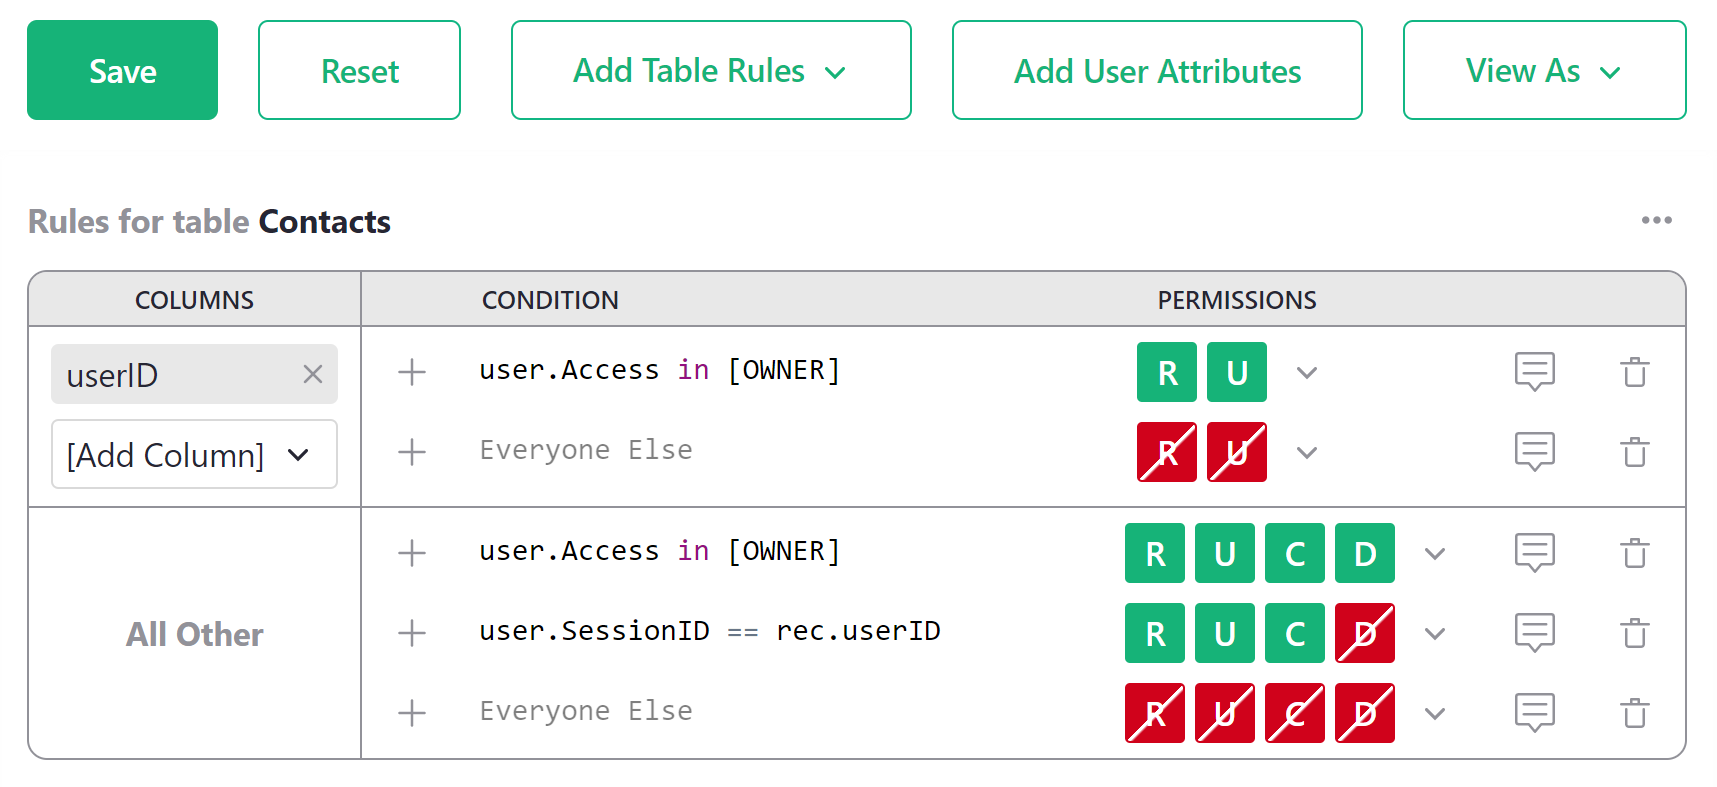
Now we want to hide the userID column from non-owners. Click the three-dot icon at the upper-right of the rules table and select ‘Add Column Rule’ from the menu.
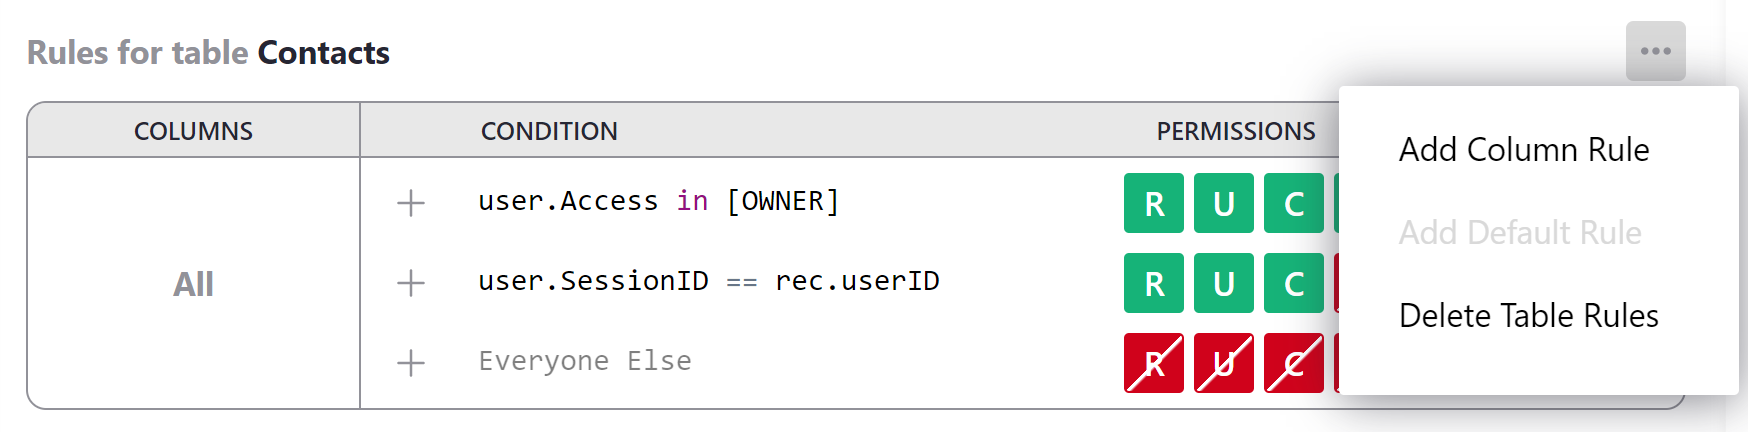
In the left hand dropdown, select the column that contains the SessionID (in this example, userID). The condition granting OWNER access will automatically be added. Add another rule for Everyone Else that denies all permissions.
Save your changes by clicking the green Save button at the top left of the page.
To make it easiest for people to fill out their contact information, especially on a mobile device, I would recommend having a single page with just a card widget for contact information like you see in the example. Then, either embed a link directly to this page or share an embedded-style link to this page.
To share an embedded-style link, edit the end of the URL to include ?style=light
![]()
This will remove all Grist Editing and Navigation bars, like you see here: Embedded-Style View
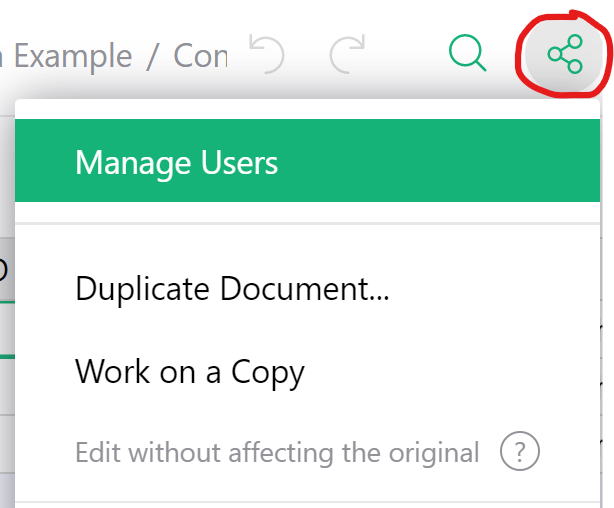
Last but not least, we need to make our document publicly accessible. Click the share icon at the top of the document then ‘Manage Users’.
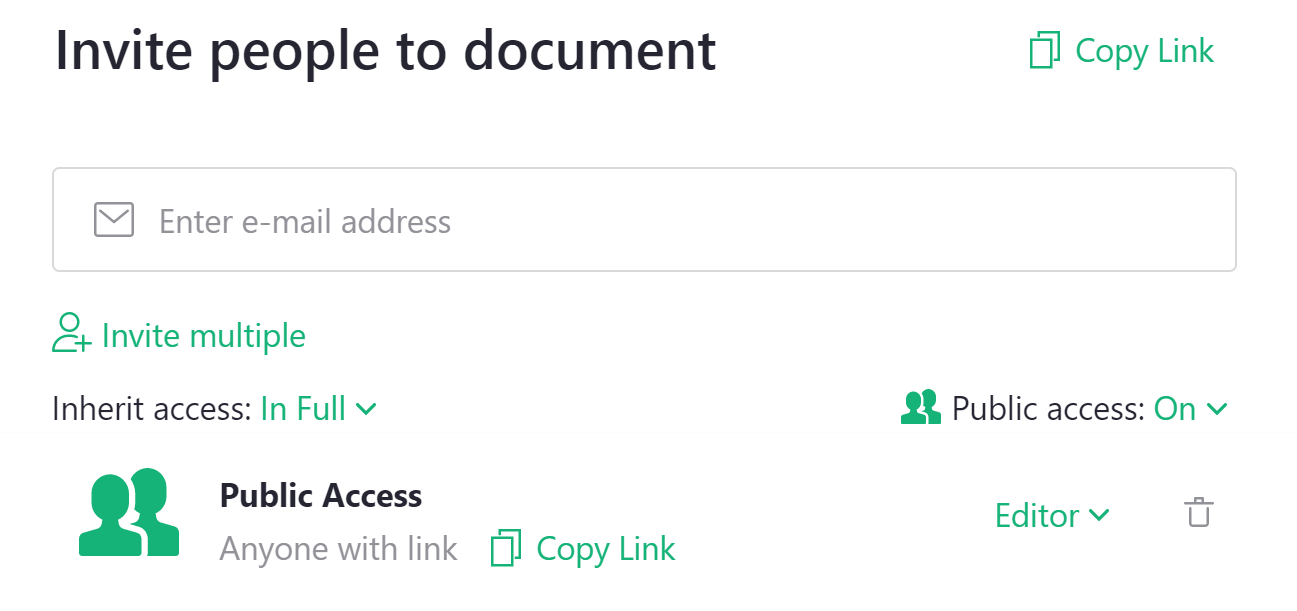
Change Public Access to On then change Public Access to EDITOR. Be sure to click the green ‘Confirm’ button to save your changes.
Be sure to test your Access Rules by viewing your URL while logged out of Grist and confirm other data is inaccessible.