The Goal
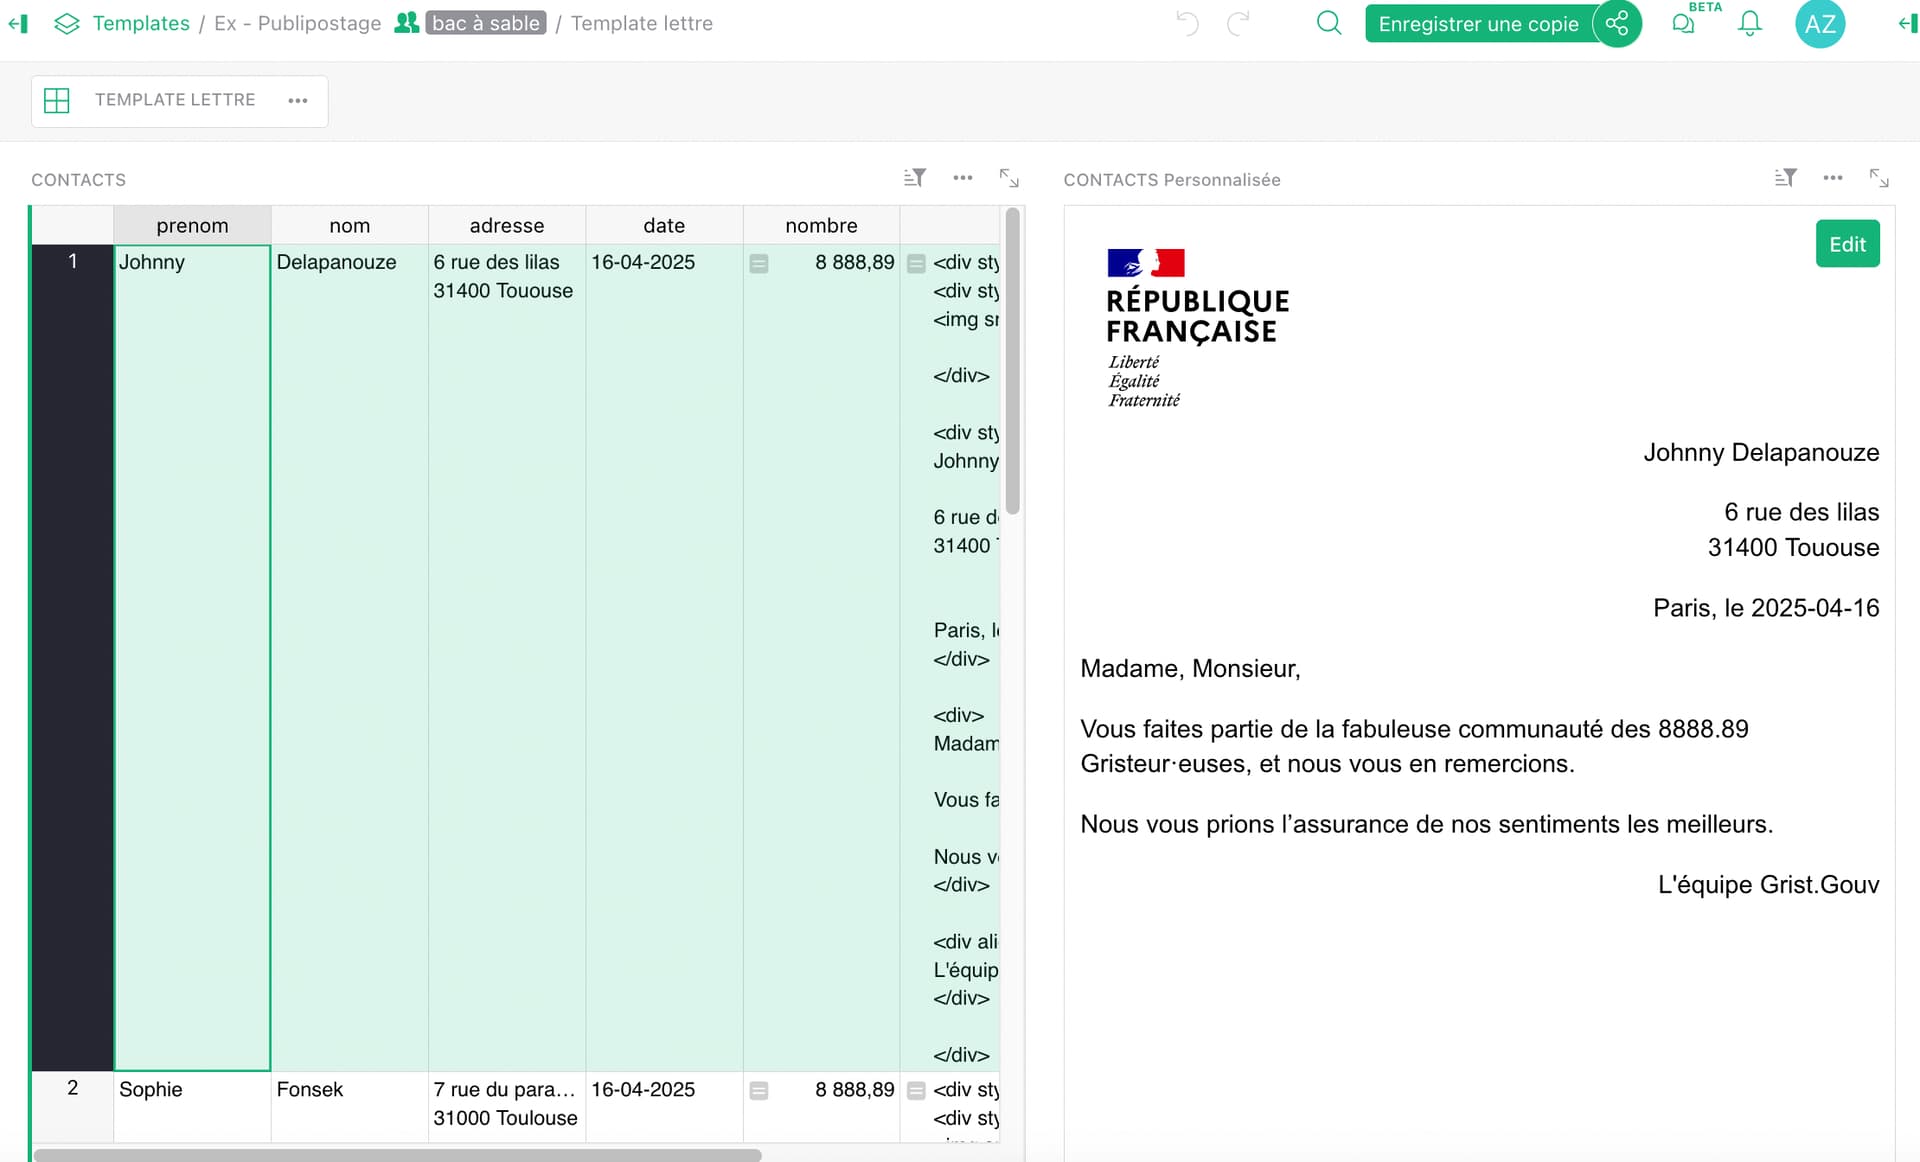
Create a document template that can be exported as a PDF and automatically populated with data from a table. For example, a personalized letter with the date, first name, last name, and address of the recipient:
The Basics
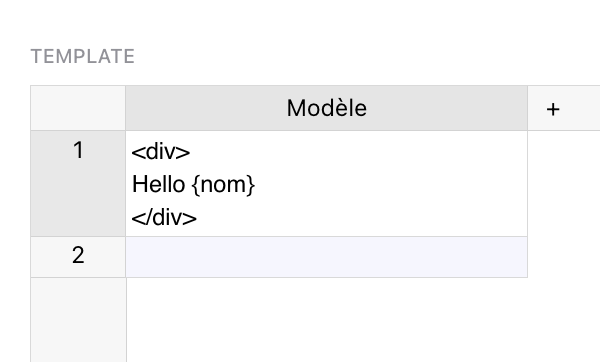
In the first table, we create our document template in HTML. This code contains our template text, a kind of sentence “with blanks” - or rather template variables that will be replaced with values at render time. These variables are recognizable because they are surrounded by curly braces {}.
Example:
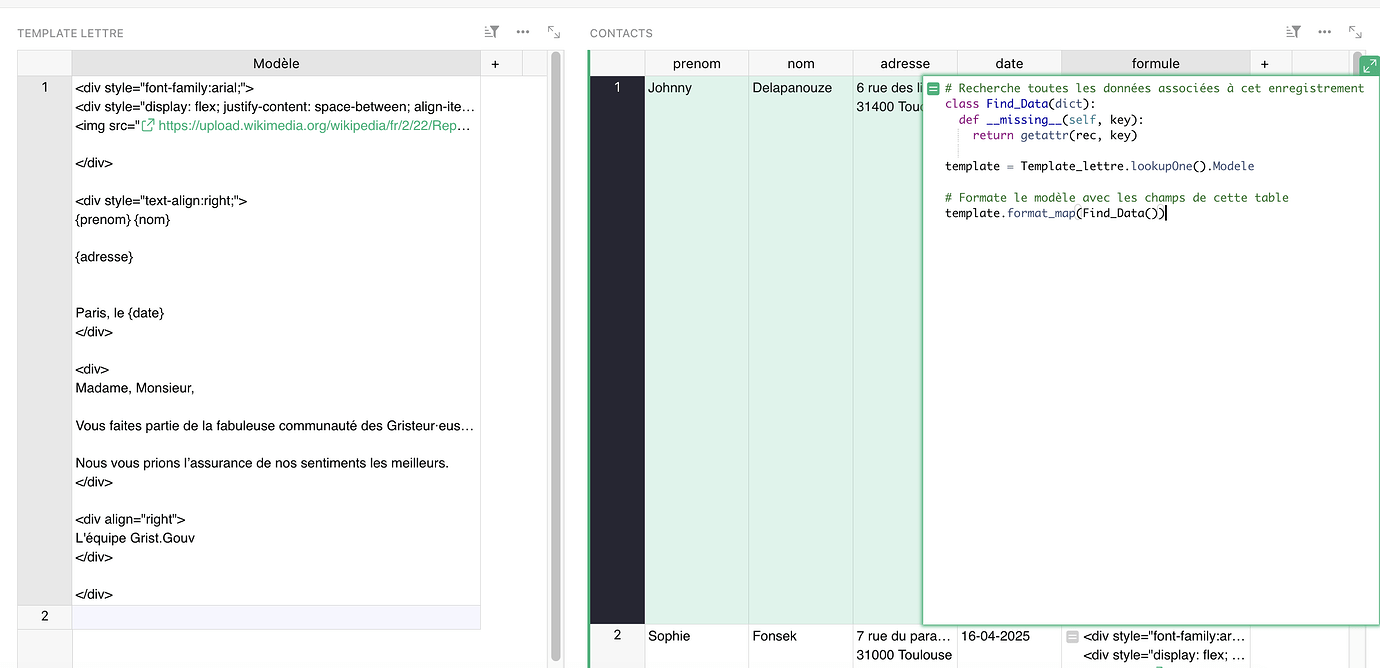
In a second table, we store the information to be displayed via these variables. We add a column with a formula that will determine which data should be displayed in which variable—the correspondence will be between the variable name and the name of a column in the data table. This will allow us to “fill in the blanks” in our text.
This formula is written:
# Class used for data search
class Find_Data(dict):
def __missing__(self, key):
return getattr(rec, key)

# 1. Retrieve the document template
template = Template_Facture.lookupOne().Modele

# 2. Format the template with the fields from the current table
template.format_map(Find_Data())
In our example, the {name} field of the template will be replaced with the data from the “name” column of the current table.
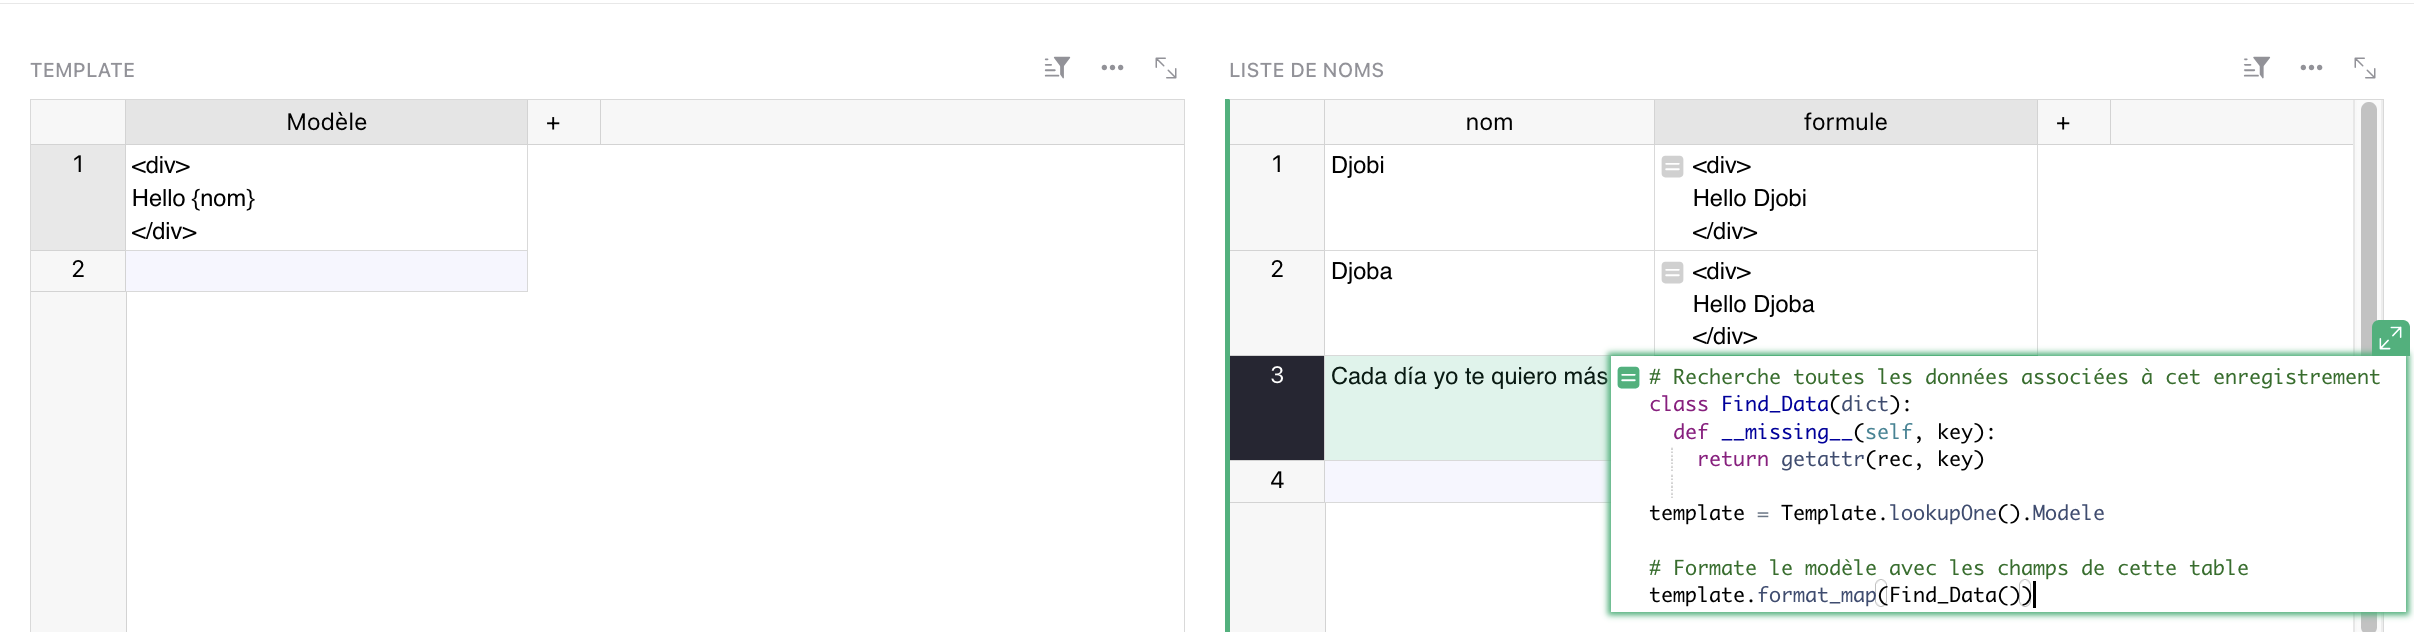
In the image above, for each row, we can see that the name has been successfully replaced, so our formula is working!
If we didn’t have a column called “name” in our current table, the formula would return an error:
AttributeError: Table 'List_of_names' has no column 'name'
We now want to have a final view of our document, rather than having the raw HTML displayed in a column. To do this, we’ll use the Markdown widget to interpret the HTML content:
- Click New > Add View > Custom > choose “Markdown” and select the table containing the dynamic data.
- In the View Configuration > View, allow full access to the document, and in the “Content” field, choose the formula column.
- In the View Configuration > Source Data, link the view to the table by selecting it in the “Select by” field.
And that’s it! From now on, when you browse the table, you’ll see your custom template appear based on the selected data. ![]()
A Letter Template
Now that we understand the basic concept, we’ll create a more complex template: a letter containing an image, formatting, and, of course, variables.
The HTML code is as follows:
I'm here
<div style="font-family:arial;">
<div style="display: flex; justify-content: space-between; align-items: center;">
<img src="https://upload.wikimedia.org/wikipedia/fr/2/22/Republique-francaise-logo.svg" width="150" />

</div>

<div style="text-align:right;">
{first name} {last name}

{address}

Paris, {date}
</div>

<div>
Dear Sir/Madam,

You are part of the fabulous Gristeur community, and we thank you for that.

We send you our sincere regards. </div>

<div align="right">
The Grist.Gouv Team
</div>

</div>
As before, we store this code in a “Template_lettre” table, “Template” column.
It contains the following dynamic fields: {firstname}, {lastname}, {address}, {date}. Therefore, our data table will need to have columns with these same names.
Our data table also has a “formula” column containing the variable replacement formula. You need to edit it to indicate the name of the table from which to retrieve the template (here, “Template_lettre”).
We then add the Markdown view, and here is the result:

Save the document
Click on the ··· at the top right of the view > Print view > Save as PDF. You can also print the document directly.
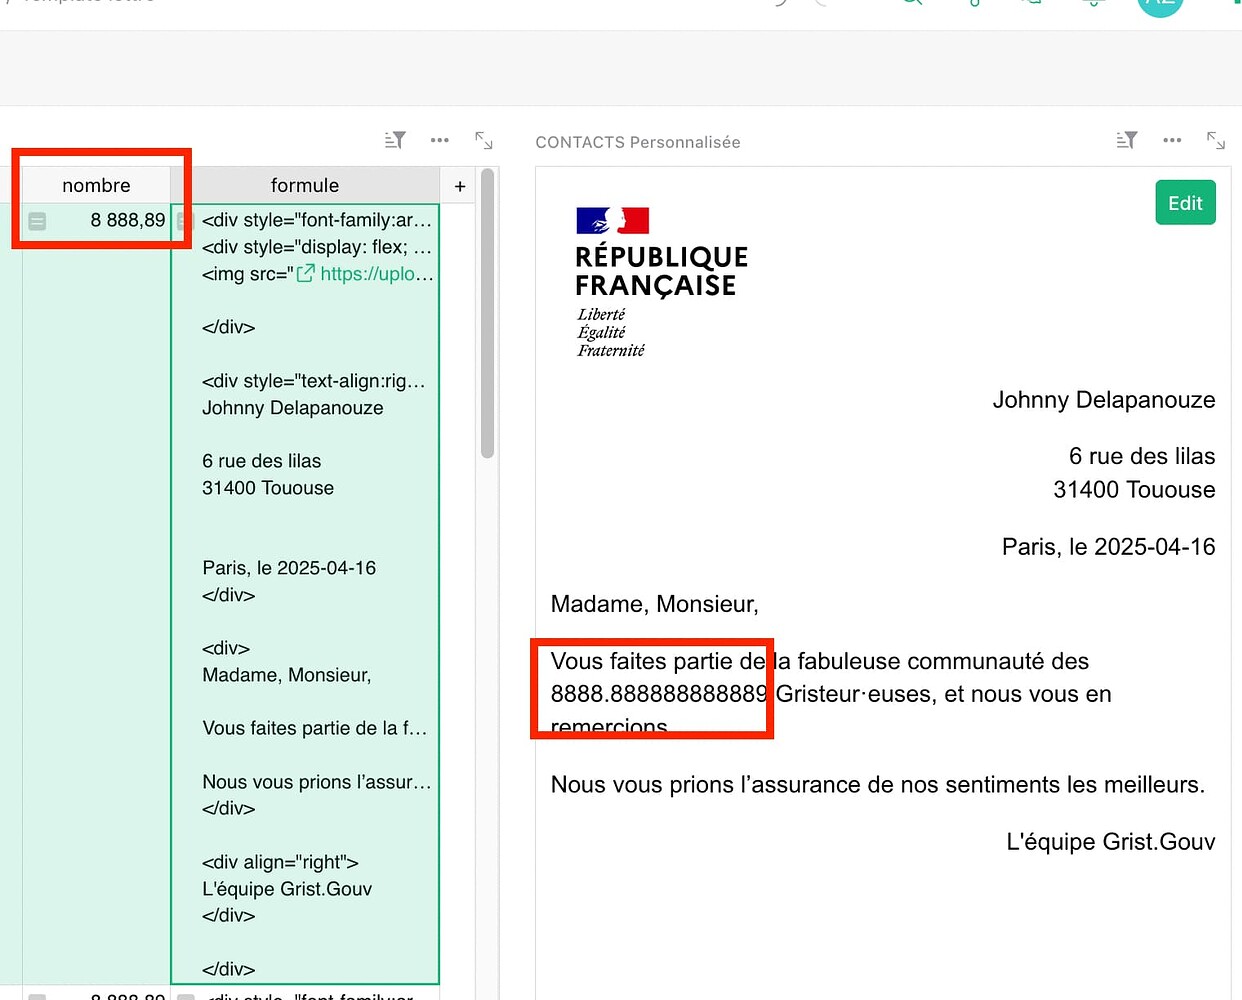
Displaying numbers
If you want to display numbers, the formatting you choose in Grist (for example, two decimal places) is not applied in the Markdown view, which retrieves the unformatted source data.
For example:
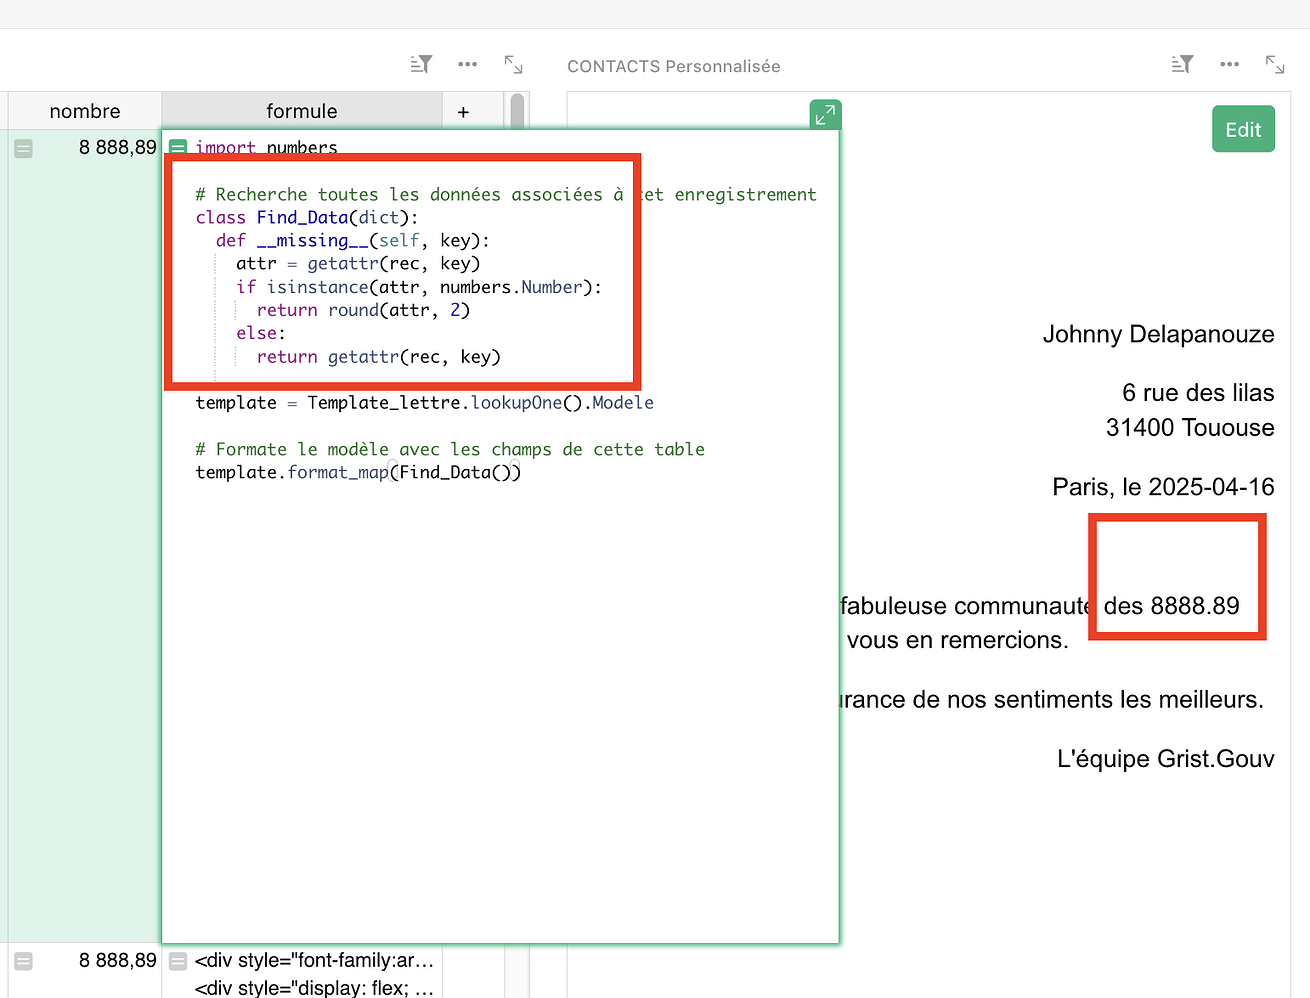
In this case, we can modify the formula to round the value, with the code
round(value, 2)
Formula with rounding
import numbers

# Class used for data search
class Find_Data(dict):
def __missing__(self, key):
attr = getattr(rec, key)

# Rounds numbers to two decimal places
if isinstance(attr, numbers.Number):
return round(attr, 2)
else:
return getattr(rec, key)

# 1. Retrieve the model of the document
template = Template_Facture.lookupOne().Modele

# 2. Format the template with the fields from the current table
template.format_map(Find_Data())
Result:
For integers, remember to format your column as “Integer” and not “Numeric”, to avoid displaying decimals in your document (for example, display 6 instead of 6.0)
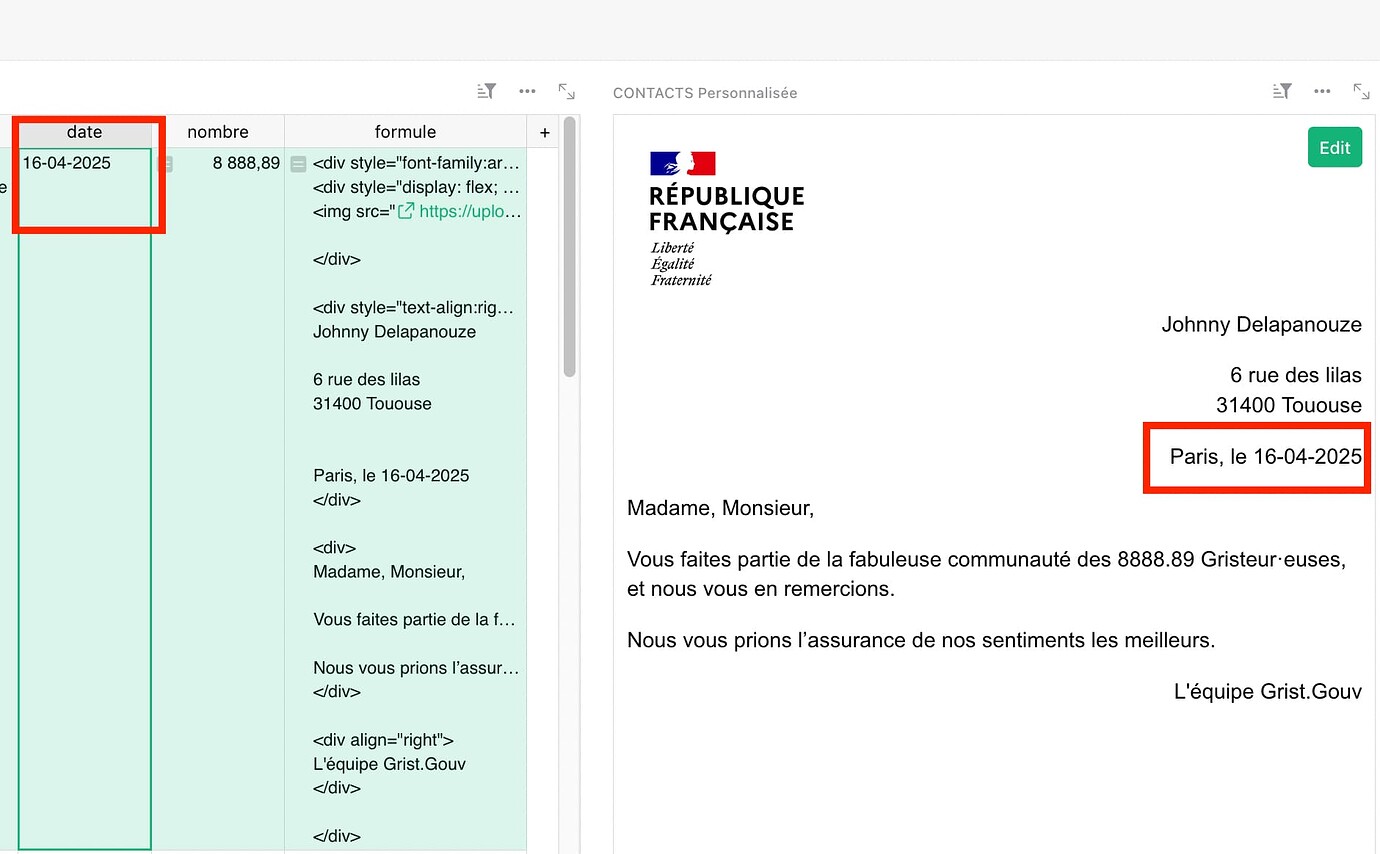
Display dates in French format
If you want to display dates, the formatting you choose in Grist (for example, DD-MM-YYYY) is not applied in the Markdown view, which Retrieves the unformatted source data.
You need to modify the formula to do this formatting with
if isinstance(attr, datetime.date):
return attr.strftime(format = '%d-%m-%Y')
Formula with date formatting and number rounding
import datetime
import numbers

# Class used for data search
class Find_Data(dict):
def __missing__(self, key):
attr = getattr(rec, key)

# Formats the date in French
if isinstance(attr, datetime.date):
return attr.strftime(format = '%d-%m-%Y')

# Rounds numbers to two decimal places
if isinstance(attr, numbers.Number):
return round(attr, 2)
else:
return getattr(rec, key)

# 1. Retrieve the document template
template = Template_Facture.lookupOne().Modele

# 2. Format the template with the fields from the current table
template.format_map(Find_Data())
Add CSS to the beginning of the HTML code
So far, we’ve integrated CSS styling element by element, using the style attribute. For example, we wrote: <div style="text-align:right;">
This method can be suitable for very simple documents, but becomes unmanageable when you want to do more advanced formatting: you’d have to repeat the style for each tag of the same type.
Best practice is to add the CSS “separately,” in the header of the HTML code, in the <head> element. The structure will be as follows:
<!DOCTYPE html>
<html>
<head>
<style>
h1
{
color:blue;
font-size:14px;
}
</style>
</head>
<body>
<h1>body ohdy</h1>
</body>
</html>
The problem is that writing the CSS style this way requires us to use {}, and our Markdown generation formula considers the curly braces as variables. However, here, they only serve to define the style! To avoid errors (for example, Grist would return an error like “AttributeError: Table ‘My_table’ has no column ‘h1’”), we’ll use a trick: “escaping” the braces by doubling them. For example:
h1
{{
color:blue;
font-size:14px;
}}
Here’s the result of a document with advanced styling: an invoice for firewood: Template Grist : Factures personnalisées - Ressources et astuces - le forum Grist
Happy Gristing! 
Useful links:
- The templates used for this post: Ex - Publipostage - Grist
- The “Publipostage Laureats” template in the ANCT gallery: Publipostage lauréats - Grist